Before my last trip, I once again caught myself thinking that packing now begins not with my suitcase, but with connectivity. You can forget an extra T-shirt or buy shampoo on arrival, but being left without internet at the airport when you need to open a card, call a taxi, or text your apartment owner is the last thing you want. So I looked at options on globustele.com in advance, chose an eSIM for my trip, and already on the road, I realized how much more relaxing traveling is when you have the internet ready before departure. I didn’t have the usual rush through the airport looking for a local SIM card, didn’t have to explain myself to the salesperson in a foreign language, and didn’t have to worry about roaming charges suddenly eating into my account.
Why I decided to try eSIM
I used to often use regular SIM cards when traveling. It seemed like a straightforward solution: I’d arrive, find a carrier counter, buy a package, and insert the card into my phone. But in practice, it wasn’t so convenient. Sometimes there were lines at the airport, sometimes they offered expensive tourist rates, and sometimes you had to show documents and wait for activation. After a long flight, all of this is more annoying than it seems.
The eSIM experience was much more seamless. The digital SIM card is already built into the phone, so there’s no need to physically change anything. I simply purchase a plan, receive data for the connection, and add the new mobile plan in the settings. This is especially convenient when traveling, because my main number stays on the phone, and the internet works through the travel eSIM. For me, this was a major advantage: my bank SMS, instant messaging, and regular contacts remain intact, while mobile data is handled through a separate package.
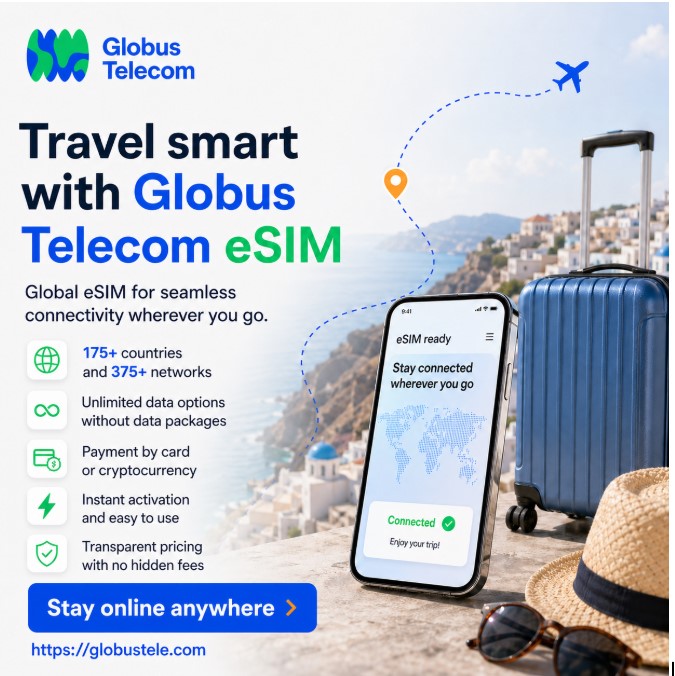
In the image, Globus Telecom emphasizes its global service: over 175 countries and over 375 networks. For the average tourist, this sounds like a marketing hype, but in reality, coverage really does matter. On one trip, I changed locations several times: the airport, the city, the coast, small towns, and the road between them. And it’s at moments like these that you realize that connection needs to work not only in the city center, where almost all operators have a good signal, but also in places where you’ve simply stepped off the bus with your suitcase and are trying to figure out where to go next.
What to check before purchasing
The first thing I recommend doing before paying is checking your phone’s compatibility. It seems obvious, but it’s a step many people skip. Not every smartphone supports eSIM, and some models have regional restrictions. If your phone was purchased a while ago or was purchased through a carrier under contract, it’s best not to rely on guesswork.
I check this directly in the settings. On an iPhone, it’s usually enough to open the Mobile section and see if there’s an option to add an eSIM or a new cellular plan. On Android, the process may be different, but the idea is the same: there should be an option to add an eSIM in the SIM card or mobile network settings. If there isn’t such an option, it’s best to first check your phone model and then choose a plan.
Another important point is unlocking the device. If the smartphone is locked to a specific carrier, a foreign eSIM may not work. I haven’t encountered this personally, but I still checked this before the initial setup, because it’s too late to deal with such restrictions while traveling. It’s better to spend five minutes at home than to search for Wi-Fi at the airport and contact support with a suitcase in hand.
How I chose a fare for my trip
The most convenient thing about eSIM for me is the ability to choose a plan for a specific route. If the trip is within a single country, it makes sense to choose a local plan. For example, for a vacation in one country, there’s no need to overpay for a large regional plan. If the route includes several countries, it’s worth considering regional options. This is especially convenient for Europe, where you can cross several borders in a single trip and not even notice until your phone starts searching for a new network.
I usually check not only the country but also my actual internet usage. I used to think I didn’t need many gigabytes when traveling. In reality, maps, navigation, cafe searches, translation, photos, messaging, booking, and banking apps quickly eat up my data. If you also download videos or work while traveling, your data plan runs out much faster.
That’s why I liked that the photo shows unlimited internet options. It’s psychologically more convenient for tourists: you don’t have to worry about every megabyte and you don’t have to worry about opening your card or sending photos. Of course, you should read the terms of any plan carefully, as different packages may have different usage rules, but the very ability to choose a more flexible connection option while traveling is a real help.
Installation before departure
I prefer to buy an eSIM in advance, when I have stable Wi-Fi at home and time to calmly go through all the steps. On a trip, everything happens faster and more stressfully: boarding, passport control, luggage, taxi, fatigue. In such a situation, even a simple setup can be frustrating. So, I open the instructions beforehand, add the eSIM to my phone, and check that the new plan has appeared in the settings.
It’s important to understand when the package’s validity period begins. For some eSIMs, it starts after installation, while for others, it starts after the first connection to the network in the destination country. This should be clarified before activation. I always read this section especially carefully to avoid losing some of my paid days before my trip even begins.
The setup process itself is usually straightforward. After purchase, you’ll receive a QR code or data to enter manually. In your phone’s settings, select “Add eSIM,” scan the code, and a new mobile plan will appear. I usually name it by country or “Travel” to avoid confusion with my main SIM card. After arriving, all you have to do is select the eSIM for mobile data and, if necessary, enable data roaming for that plan.
What I appreciated on the road
The most enjoyable moment happened right after landing. While other passengers were connecting to the airport Wi-Fi, searching for operator stands, or turning on expensive roaming charges, I already had internet access. I opened the map, checked the route to my accommodation, texted to say I’d arrived, and calmly called for transportation. It seems like a small thing, but after a flight, such small things can have a big impact on my mood.
I also liked that I didn’t have to remove my main SIM card. When I was traveling, I was always afraid of losing it. A small card, a new SIM card tray, being in a hurry, carrying a bag, and documents—all of this creates unnecessary risk. With an eSIM, you don’t have to remove anything, and your main number remains active. This is especially important for me because of bank notifications and messaging apps, which are linked to my regular number.
I’d especially like to highlight the transparency of the terms. The image indicates that Globus Telecom has no hidden fees, and payment can be made by card or cryptocurrency. When traveling, I really appreciate clear pricing, as unexpected charges for communication are always unpleasant. When you see in advance what you’re paying for, how long you’re paying for, and which country you’re purchasing the package for, it makes planning your trip easier.
Mistakes to Avoid
The biggest mistake is buying an eSIM at the last minute without checking the phone and the plan’s terms. I understand the desire to do everything quickly, especially when you’re only a couple of hours away from your flight, but it’s best not to rush when it comes to internet in another country. You need to make sure your smartphone supports eSIM, that it’s not carrier-locked, that you’ve selected the correct region, and that the plan’s validity period matches your travel dates.
Another mistake is choosing too small a data plan. When traveling, your internet usage quickly fades. Even if you’re not watching videos, navigation, bookings, translation, maps, and messaging gradually eat up a lot of data. I once took the minimum plan and found myself constantly checking my remaining balance at the end of the trip, even though I just wanted to enjoy the trip. After that, I started choosing a plan with more bandwidth.
Don’t remove the eSIM if it doesn’t work right away. Sometimes it’s enough to switch mobile data to the correct plan, enable roaming for the eSIM, or reboot the phone. Some profiles can’t be reinstalled after removal, so it’s best to calmly check the settings first. When traveling, I always keep the instructions in notes or screenshots so I don’t have to rely on the internet during setup.
Who is eSIM especially suitable for?
In my experience, eSIM is especially convenient for those who want to fly and be connected right away. It’s a good option for tourists who don’t like searching for local SIM cards, for business travelers, for those traveling to multiple countries, and for travelers who frequently use maps, translation apps, and online services.
It’s also a lifesaver for those who don’t want to rely on public Wi-Fi. Internet in hotels, cafes, and airports can be slow, congested, or unstable. And sometimes you need to open a banking app, download a ticket, contact your host, or find your way right away. In such moments, your own mobile internet gives you a sense of control.
For me, eSIM has become one of those things that doesn’t seem to change the route itself, but makes the trip noticeably more comfortable. You think less about technical details and focus more on the road itself, the people, the views, the food, the walks, and the experience.
Summary before purchase
Before purchasing an eSIM, it’s best to calmly check your phone’s compatibility, select a plan based on your country or region, estimate your data usage, and carefully review the plan’s validity period. It’s best to do this in advance, while you’re at home, with decent Wi-Fi, and unhurried. Then, on the day of your trip, you can simply activate the desired plan and enjoy your connection.
My experience with eSIM was positive precisely because I prepared before departure. I didn’t have to search for a SIM card on the spot, worry about roaming charges, or rely on random Wi-Fi. As a result, connectivity became a part of the trip that simply works. And for a tourist, this is perhaps the best option: when the internet doesn’t distract from the trip, but quietly helps when needed.