How to Enable Developer Options & USB Debugging
How to Enable Developer Options & USB Debugging
Numerous Android utilities make use of the Android Debug Bridge, or ADB, to transfer commands from your computer to your phone or tablet. This enables such utilities to execute terminal commands that would not be possible without root access on Android in some cases.
Before you can begin working with an ADB mod on the computer side, you must first enable "USB debugging" on your Android device. However, this option is hidden in a secret settings menu that you must first activate.
1. Activate the 'Developer Options' menu that is hidden
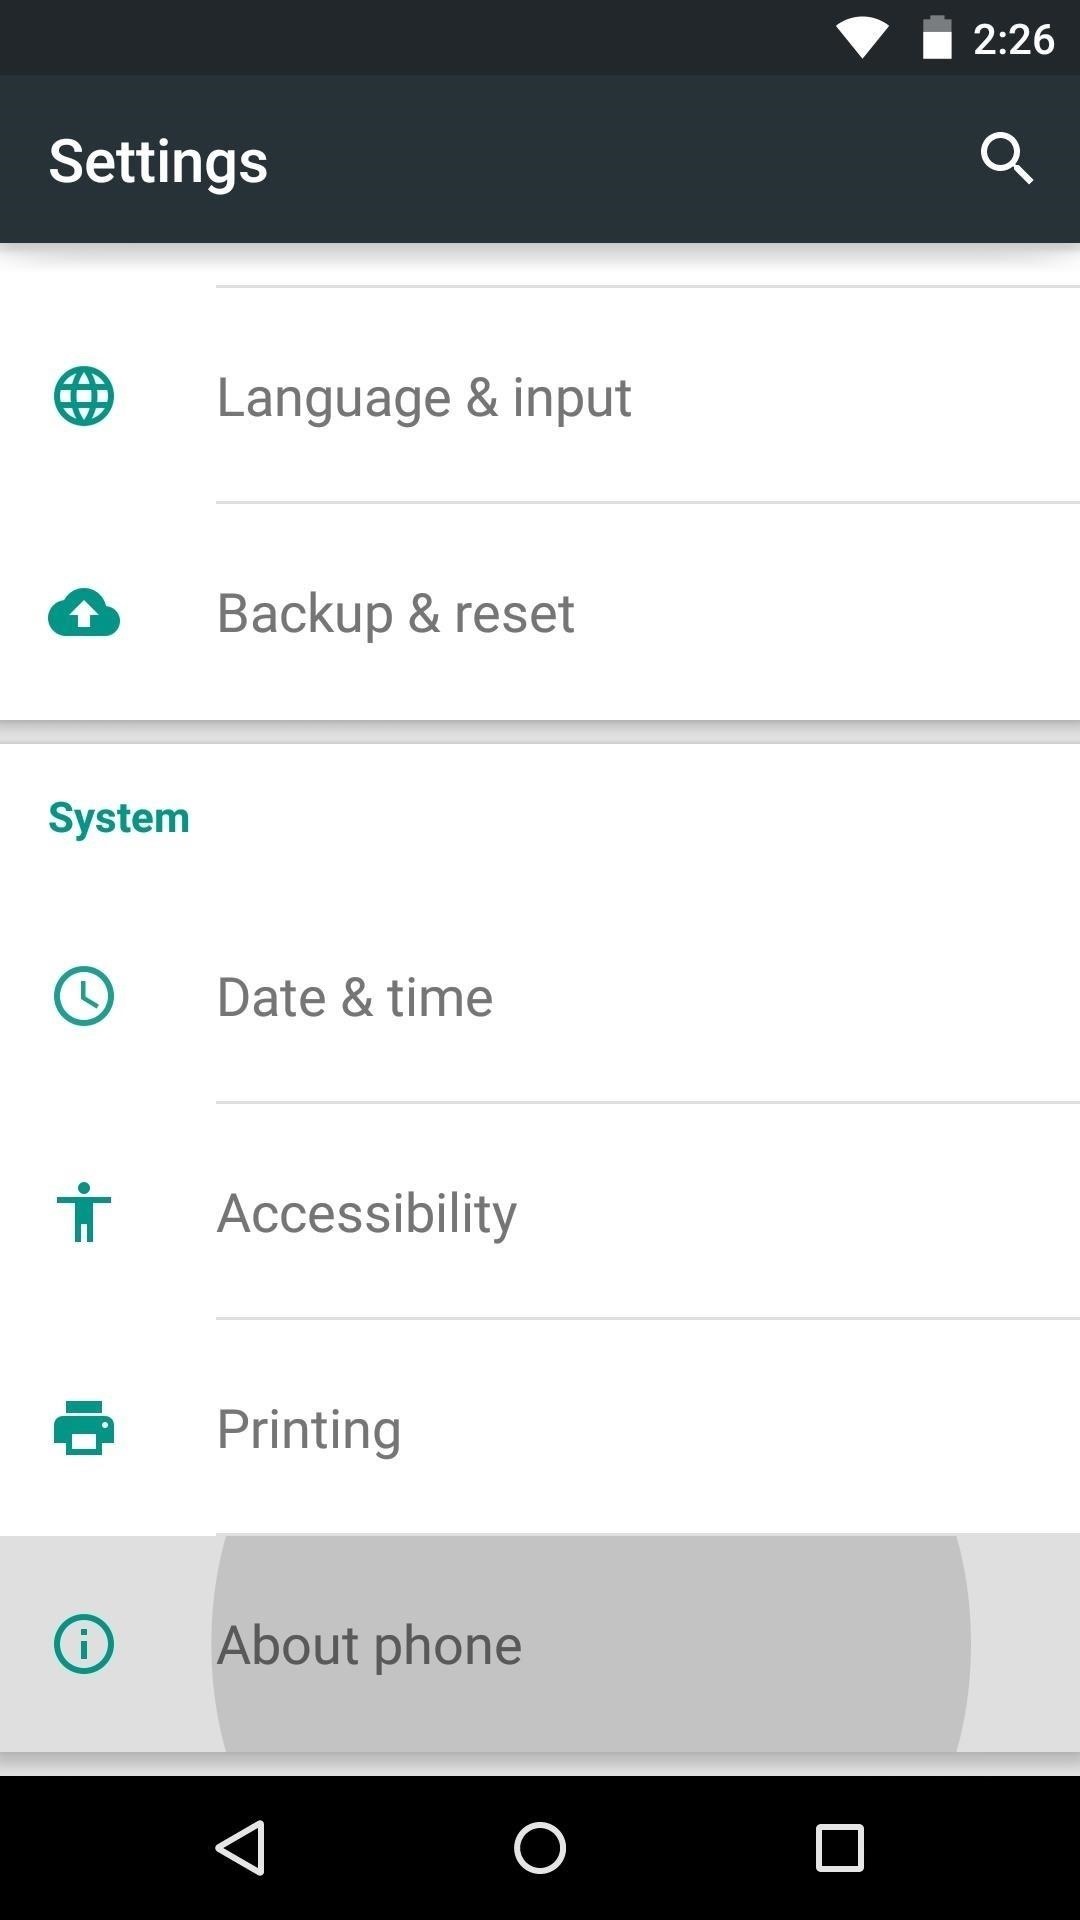
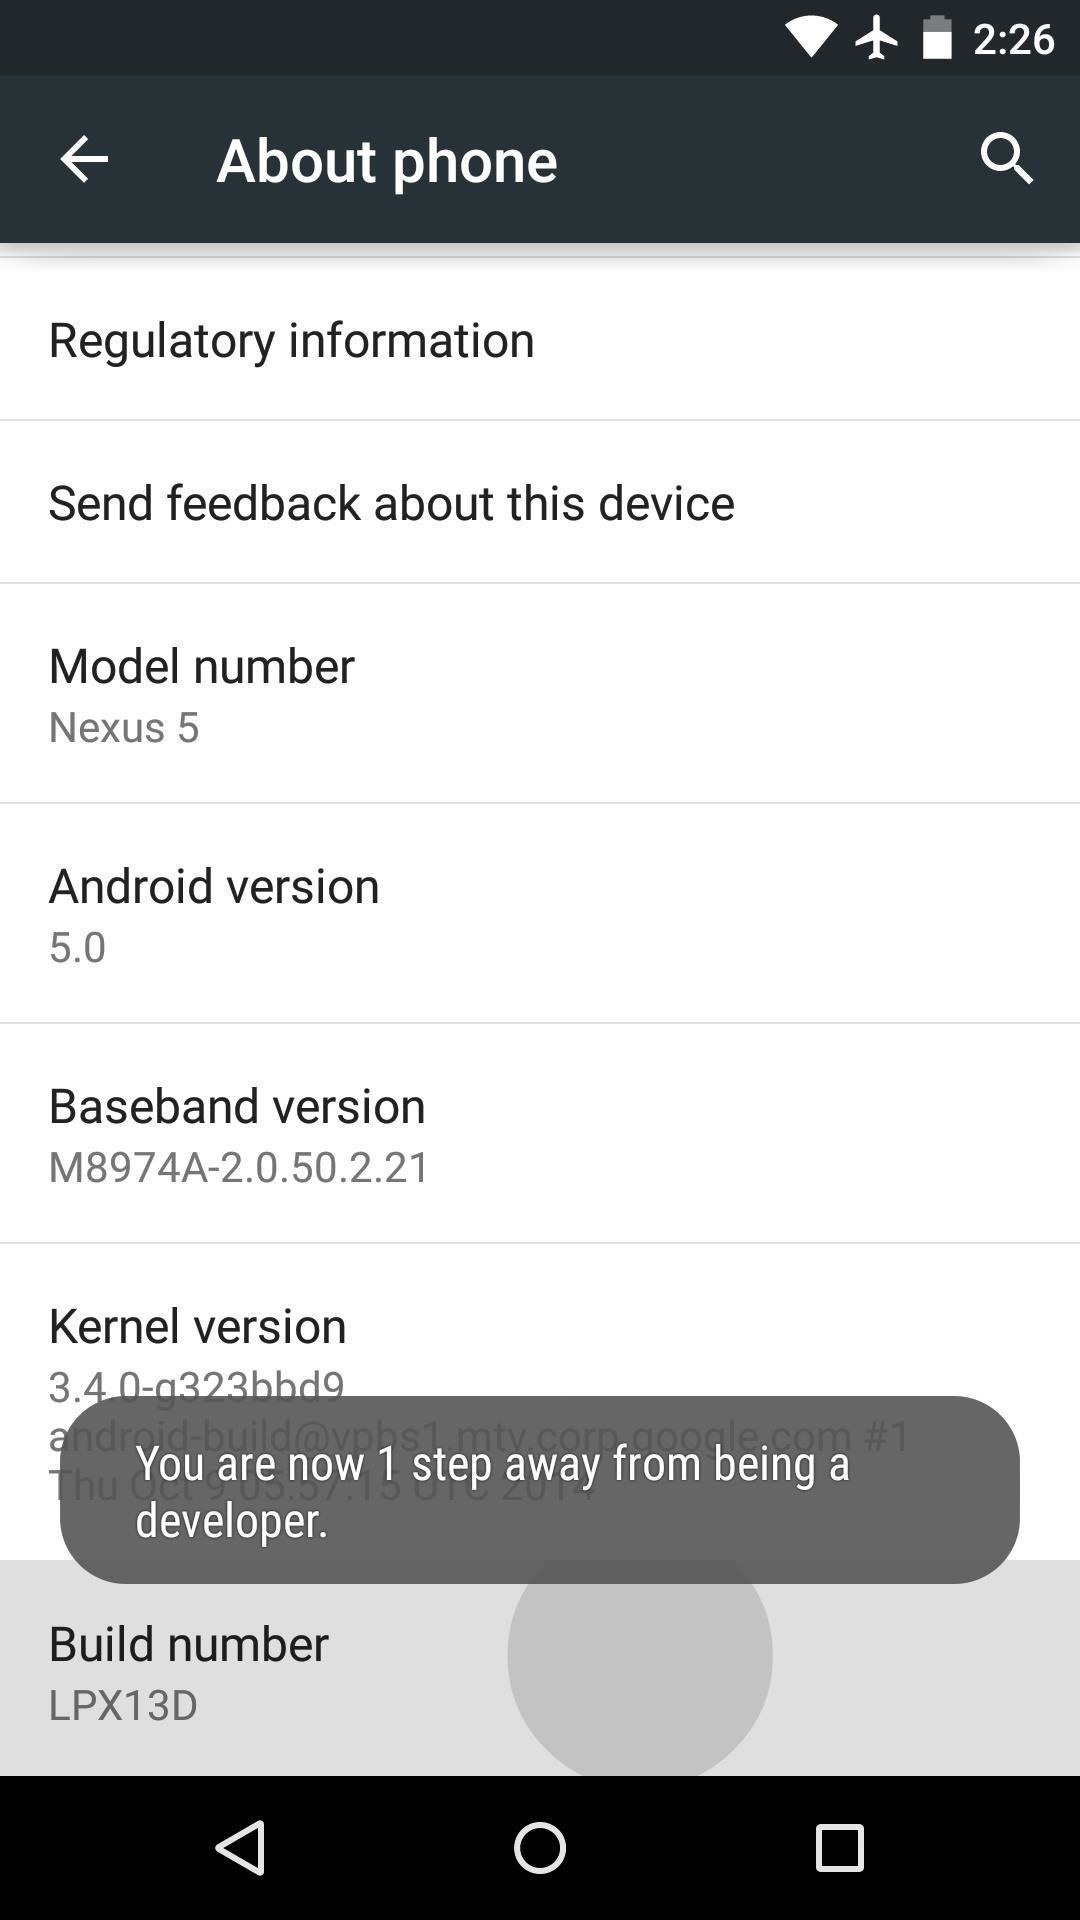
These settings may vary slightly by device, but the gist should be the same. To begin, navigate to your Android device's main Settings menu, then scroll all the way down to "About phone," "About tablet," or "About device." Scroll down to the bottom of the list and tap the "Build number" entry seven times in rapid succession from here.
To do so with an Amazon Fire device, navigate to Settings -> Device options and repeatedly tap on "Serial number." If you have a more recent device, such as a Samsung Galaxy S9 or a Google Pixel running Android P, the process is slightly different; therefore, click those links to see how it's done.
At this point, a toast message should appear stating "You are now a developer," indicating that you have unlocked the hidden Developer options menu.
2. Enable 'USB Debugging'
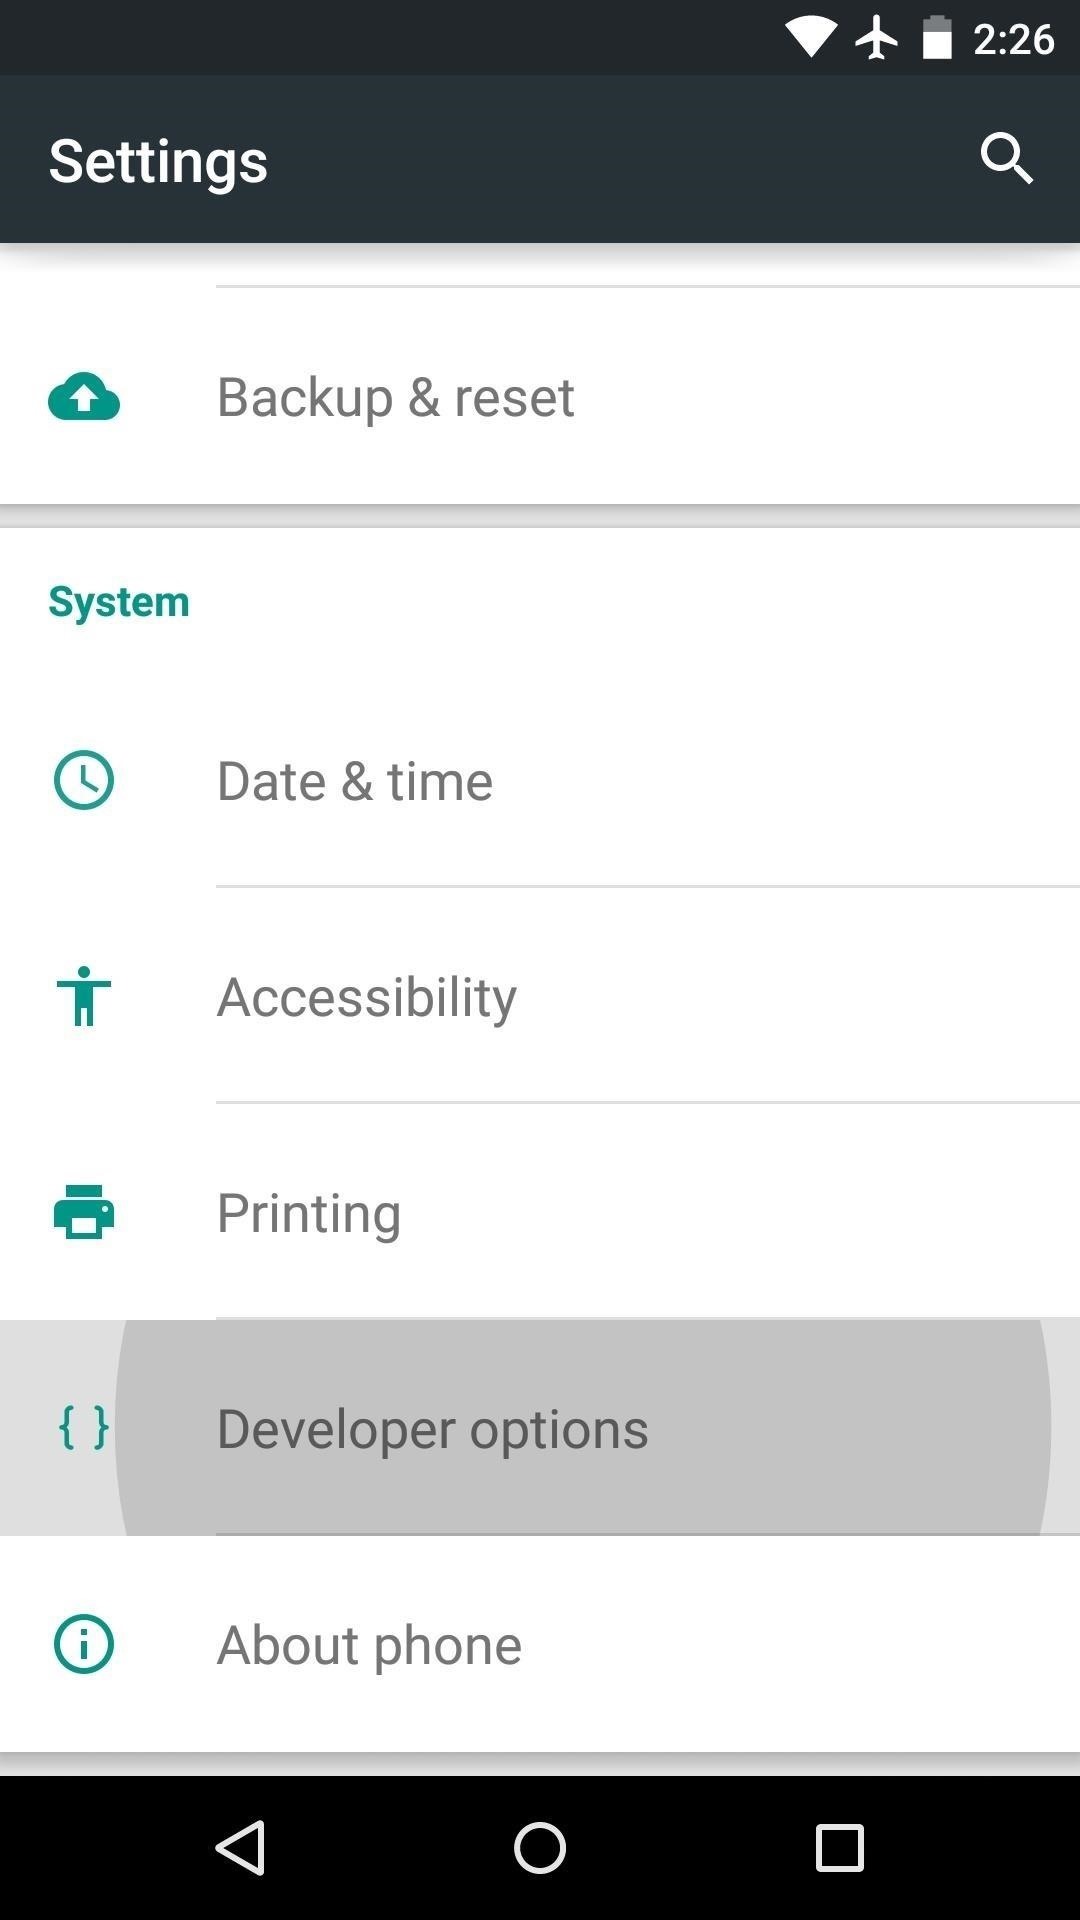
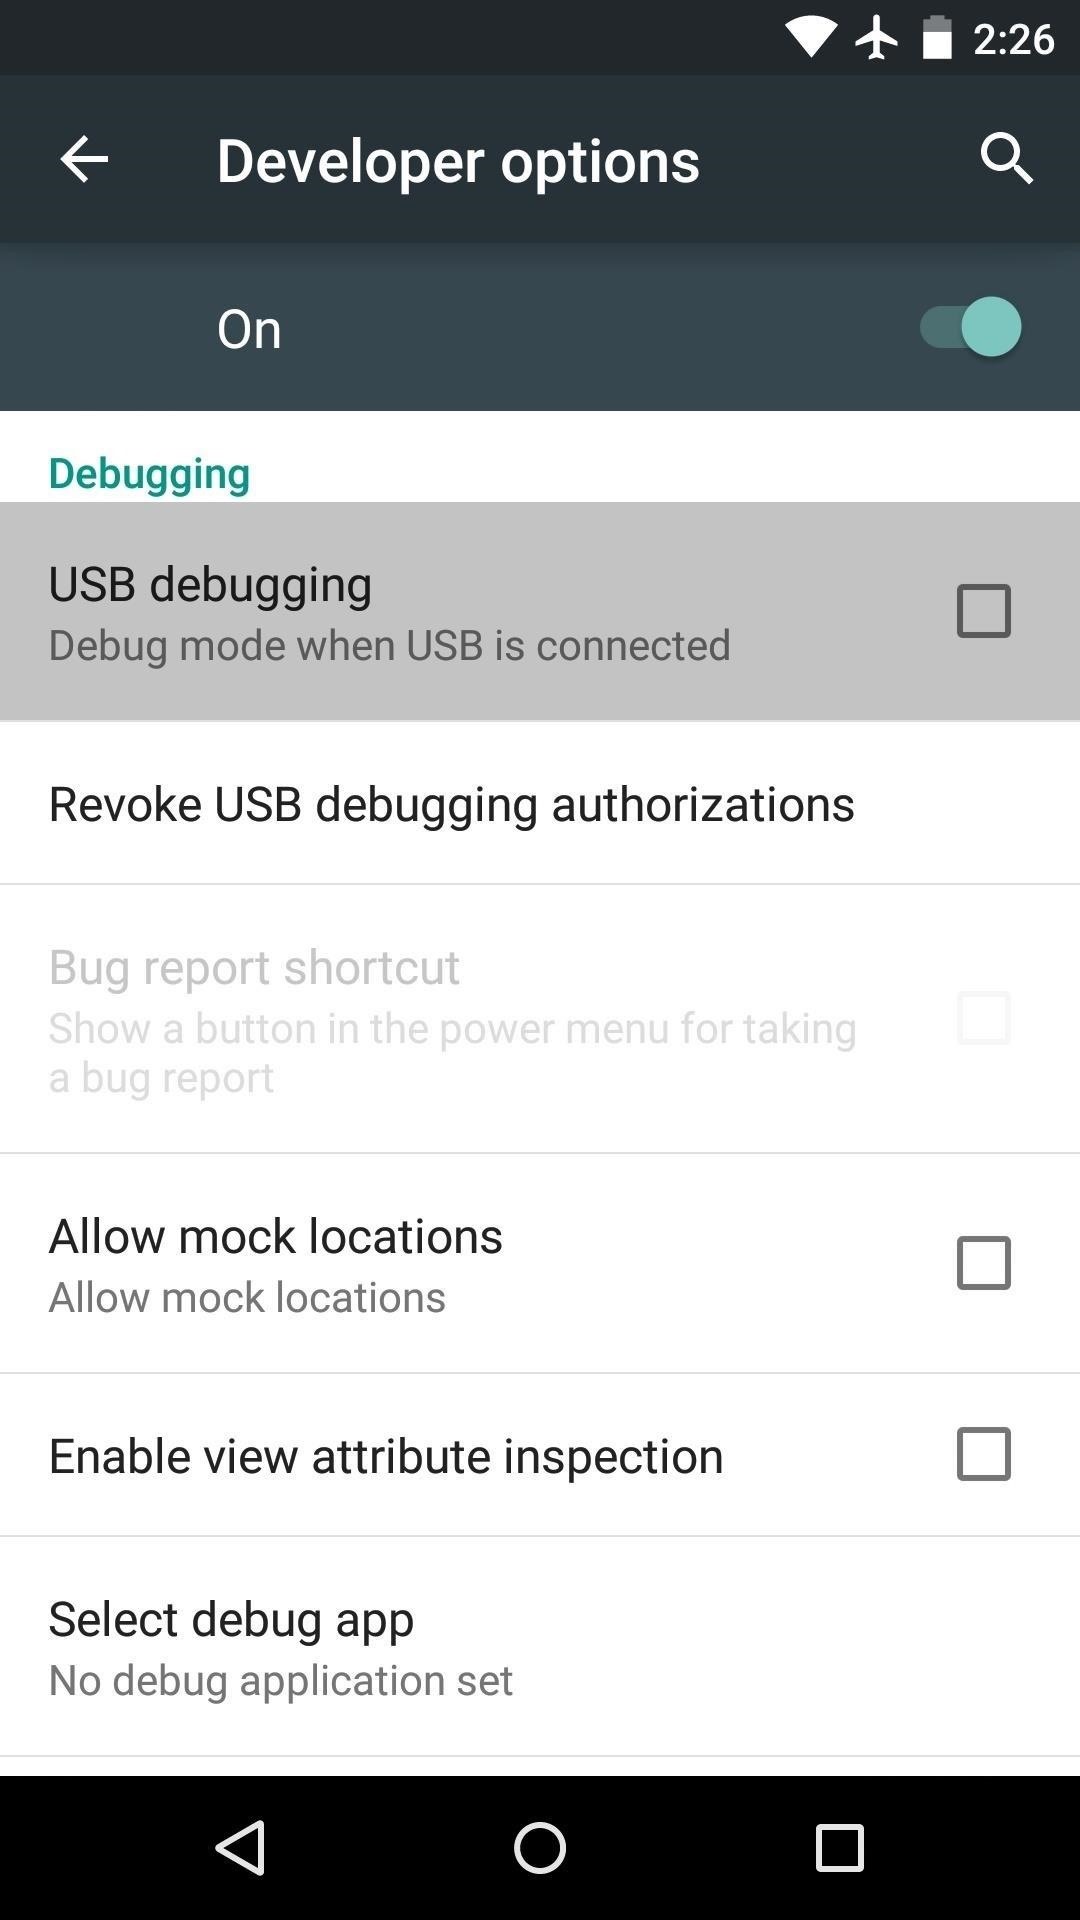
Following that, back out one level to return to the main Settings menu. Select the "Developer options" entry near the bottom of this screen that you just unlocked.
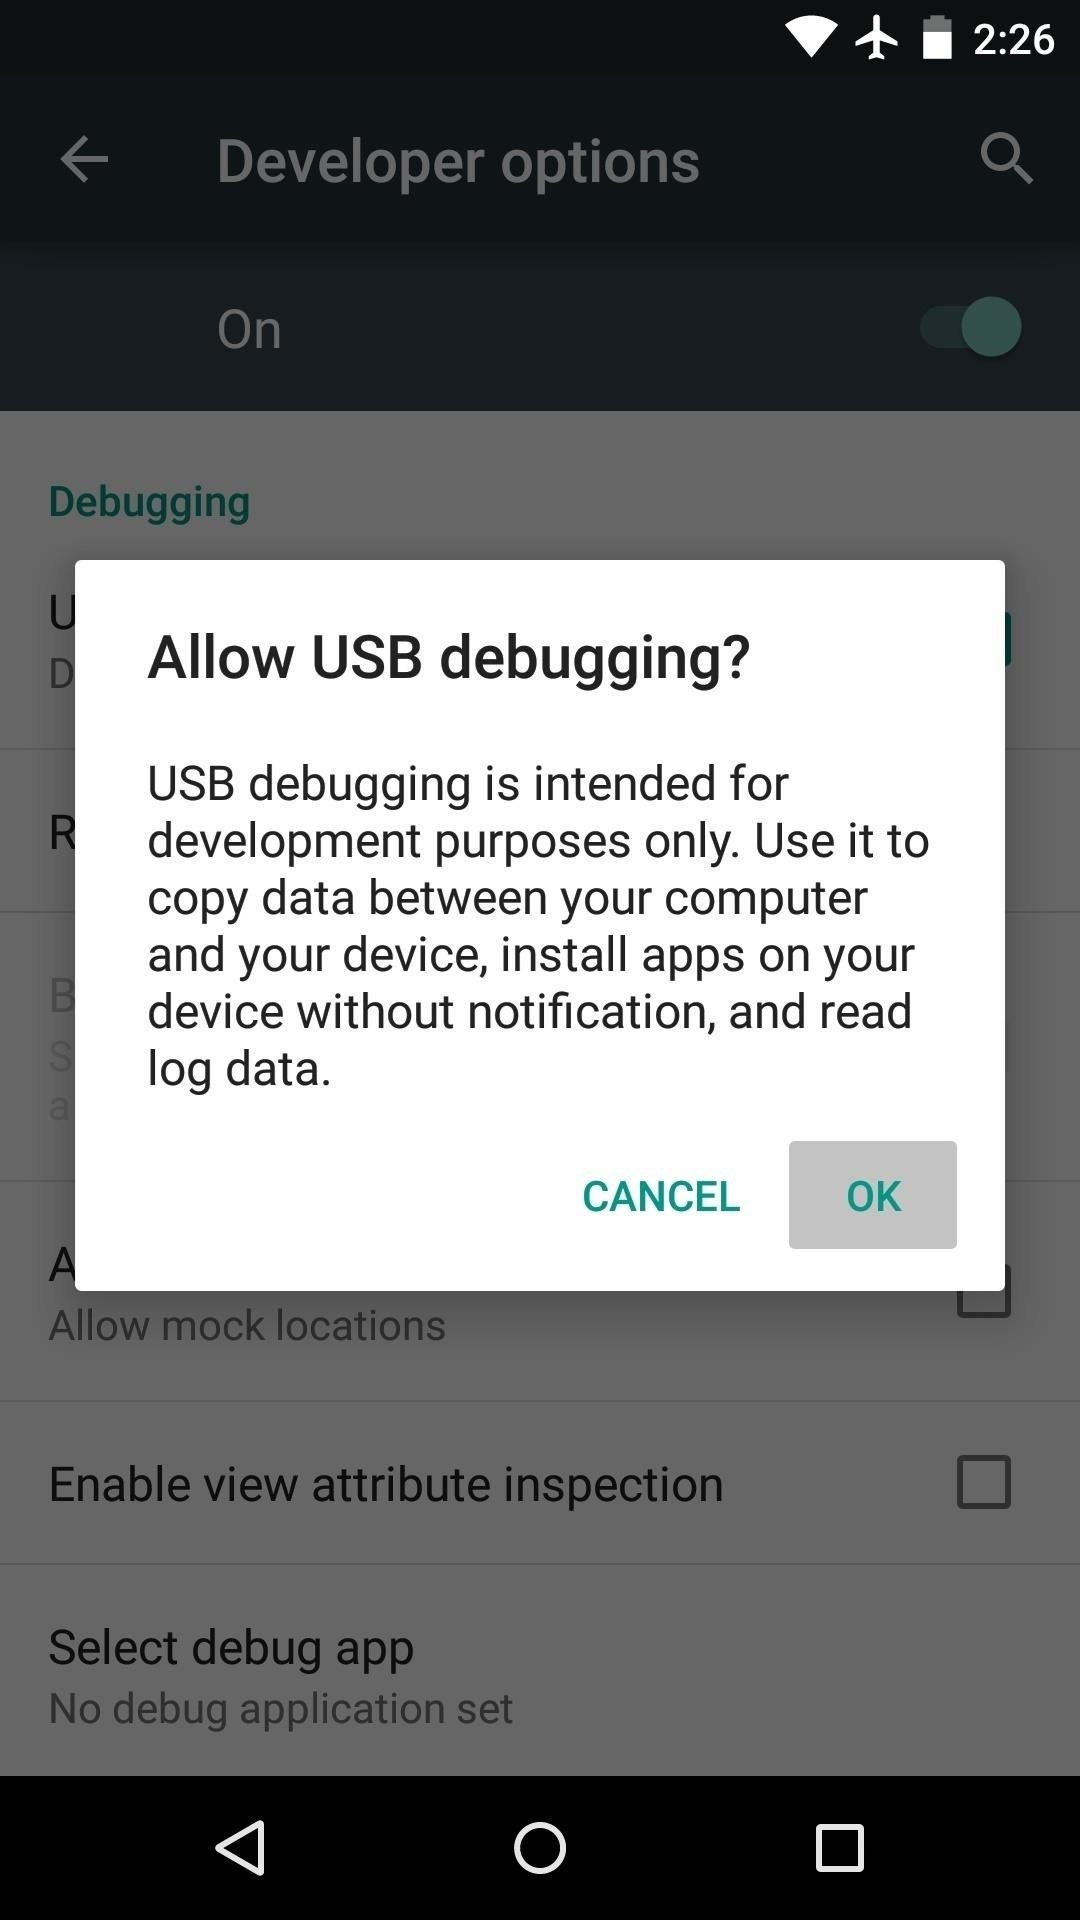
Select the checkbox next to "USB debugging" and then click "OK" on the popup.
Your Android device is nearly ready at this point, but the computer side of the connection must be configured before you can fully utilize ADB.
3. Allow USB Debugging Connection
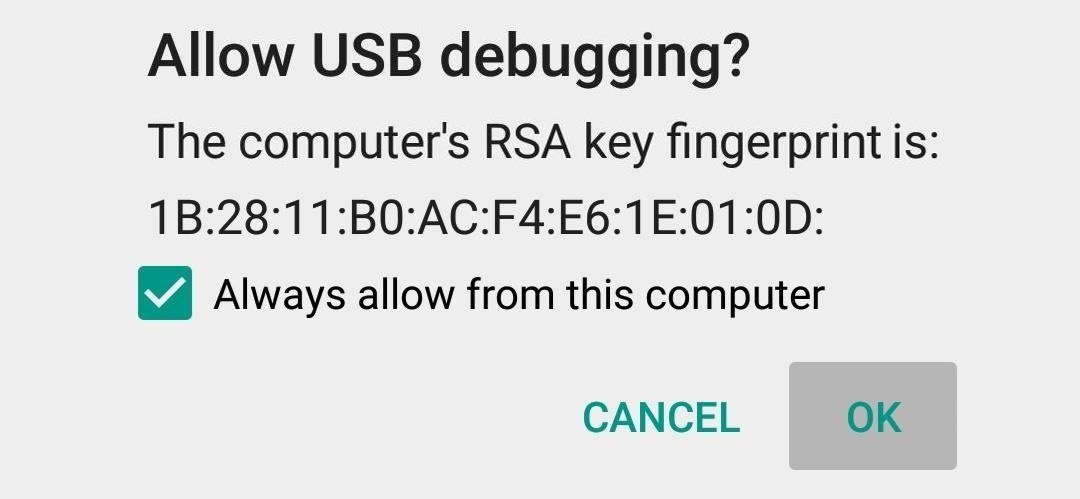
Once the drivers and software are configured on your computer, use a USB data cable to connect your Android device to your desktop or laptop. At this point, your Android device should display a message asking if you want to allow this computer to connect. On this message, check the box next to "Always allow from this computer," then click "OK."
If you do not see this message, it could be because of a conflict with the USB storage connection on your phone or tablet. If this is the case, navigate to the main Settings menu on your device and select "Storage."

Tap the three-dot menu button at the top of the screen to access the menu, then select "USB computer connection."
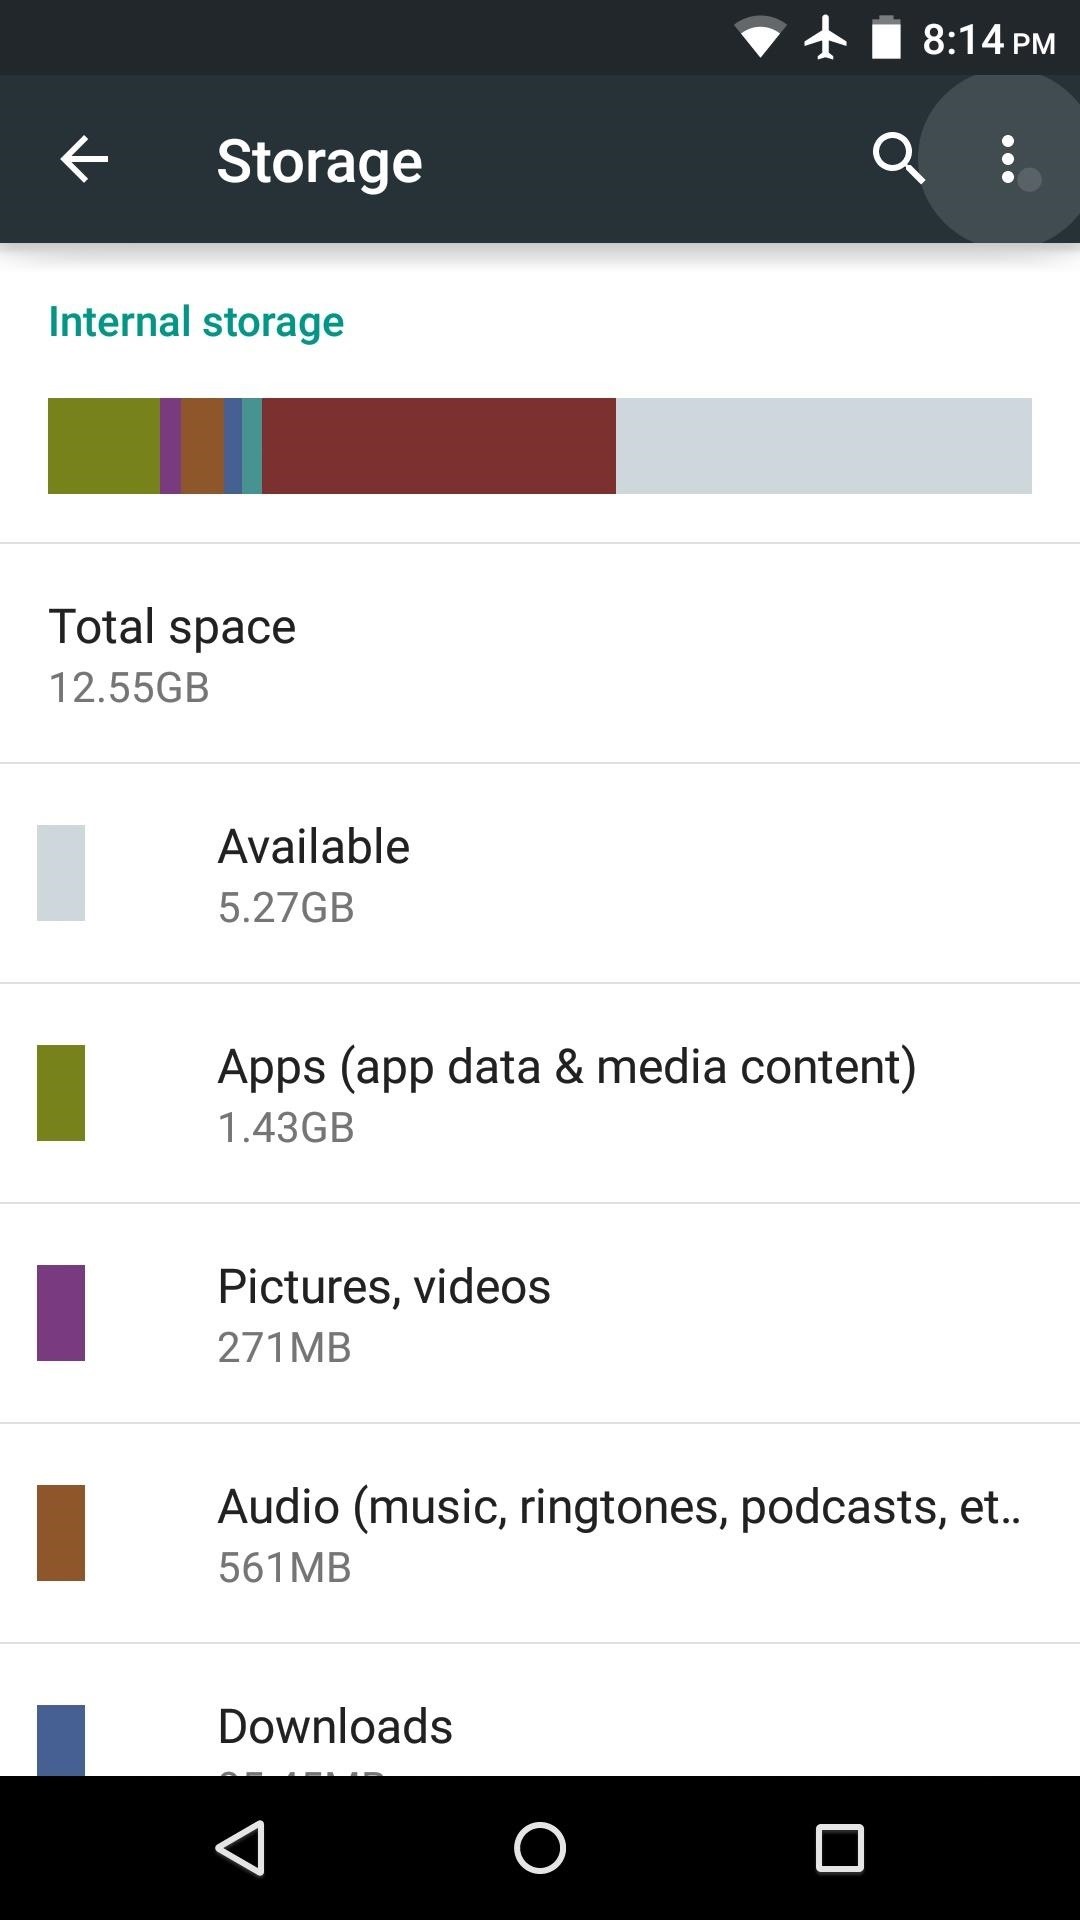
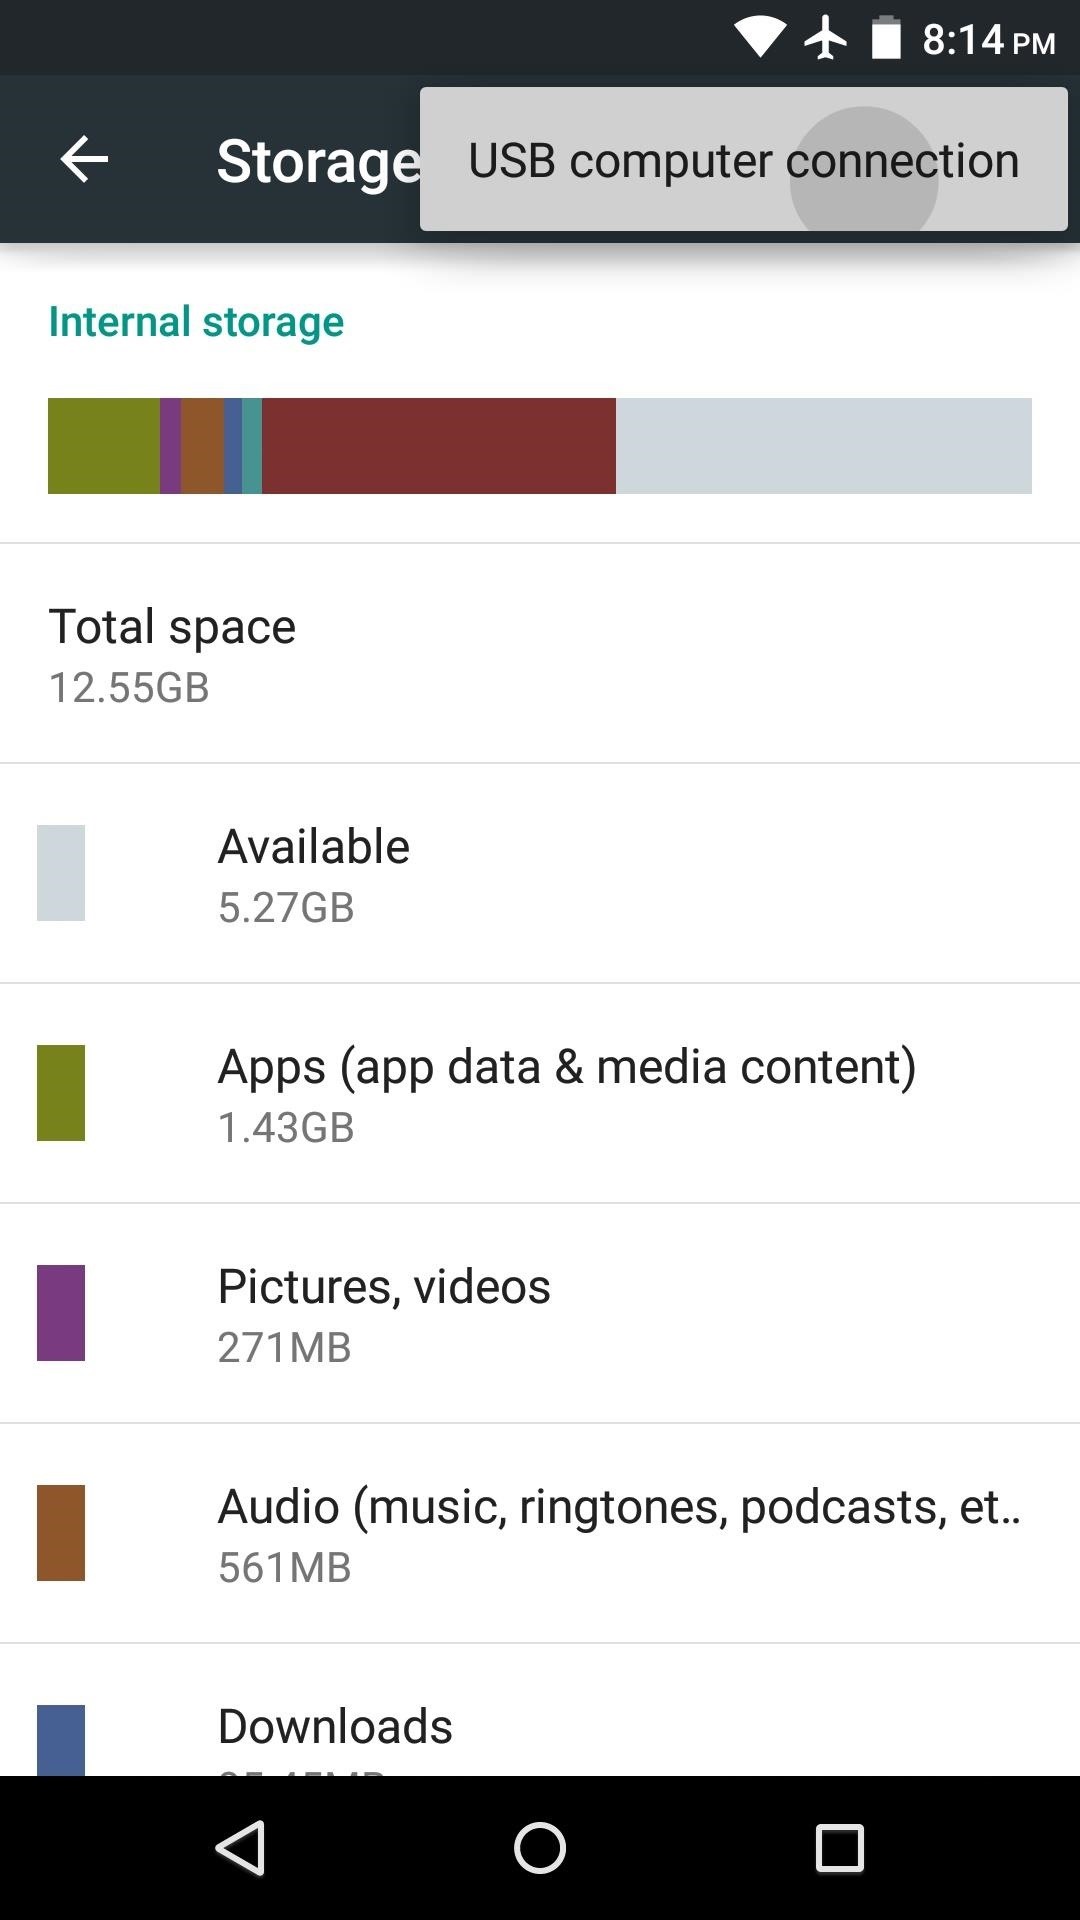
If "Media device (MTP)" is selected here, change it to "Camera (PTP)". At this point, you should see the previously missed "Allow USB debugging" message.
Conclusion
Once you've enabled USB debugging on your Android device, you're ready to send ADB commands from your computer.

