How To Remove Chromatic Aberration in Photoshop
How To Remove Chromatic Aberration in Photoshop
Chromatic Aberration (a.k.a. color fringing) occurs when light of different wavelengths is refracted differently as it passes through a lens element. This prevents the wavelengths from intersecting with the focal plane of the camera's sensor, and because different wavelengths represent different colors, this results in the lurid fringes we'd all prefer to avoid.
This effect is amplified at wider apertures and at the lens's longest or widest focal lengths. Lens manufacturers make a concerted effort to minimize chromatic aberration and other distortions by employing a variety of element combinations and specialty elements, such as Nikon's Super ED and Short-wavelength Refractive glass. However, all lenses are subject to some degree of chromatic aberration – which is where the best photo editing software comes in handy!
![]()
Color fringing is most noticeable when shooting in high-contrast lighting conditions, but this does not mean you should avoid these situations. In post-production, editing software has made it simple to remove chromatic aberration, and in this article, we'll show you how to do so in Adobe CC.
While you can remove chromatic aberration using Photoshop's Lens Correction filter, the quickest way to do so is to check the Remove Chromatic Aberration checkbox in the Lens Correction panels of Camera Raw or Lightroom. Photoshop shines when it comes to non-destructively editing your shot or removing stubborn examples of color fringing using layer masks.
How To Remove Chromatic Aberration in Photoshop
1. Vintage Vibes
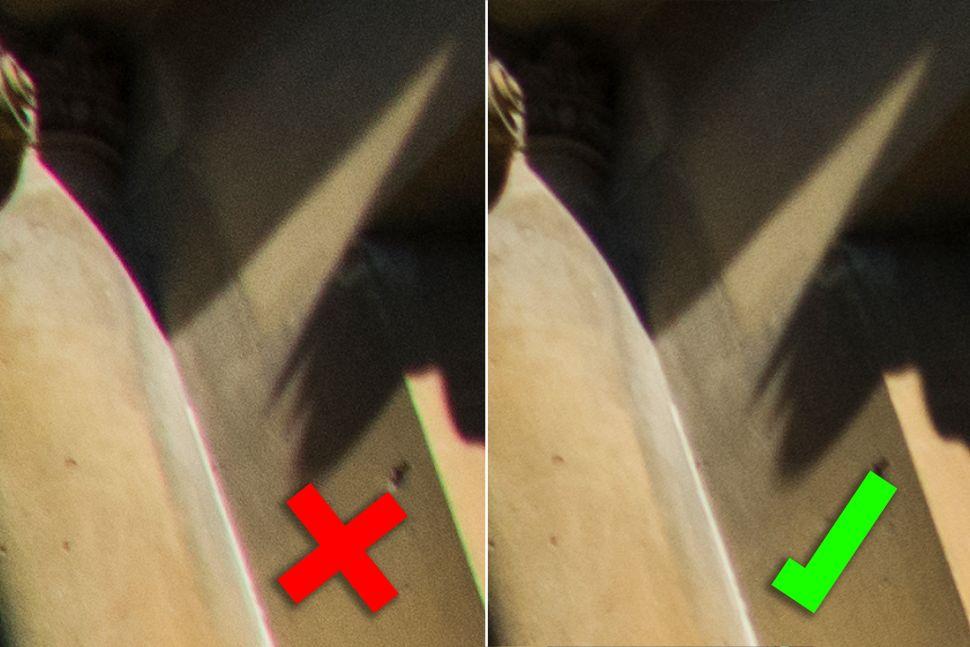
High-end lenses have become extremely adept at minimizing chromatic aberration, and some – such as the new Nikon Z 70-200mm f/2.8 VR S – almost completely eliminate it. However, older lenses – such as our Nikon AF-n 28-85mm f/3.5-4.5 – are more prone to fringing. Fortunately, editing software allows you to minimize this distortion.

(Image Credit: Future; DigitalCamera)
2. Lens Corrections
Both Adobe Camera Raw and Lightroom include Lens Correction panels that are very similar. The Remove Chromatic Aberration checkbox effectively eliminates color fringing, while the Defringe sliders on the Manual tab allow you to further refine the effects.
Use masks and blending modes to banish harsh fringing

(Image Credit: Future; DigitalCamera)
1. Bit of a blur
Open your image in Photoshop and use Cmd/Ctrl + J to duplicate the 'Background' layer. Navigate to the top toolbar by selecting your duplicate layer in the Layers panel. To open the Gaussian Blur window, navigate to Filter > Blur > Gaussian Blur. Our Radius is set to 8.0 pixels, but this value will vary according to the size of your image.

(Image Credit: Future; DigitalCamera)
2. Blending modes
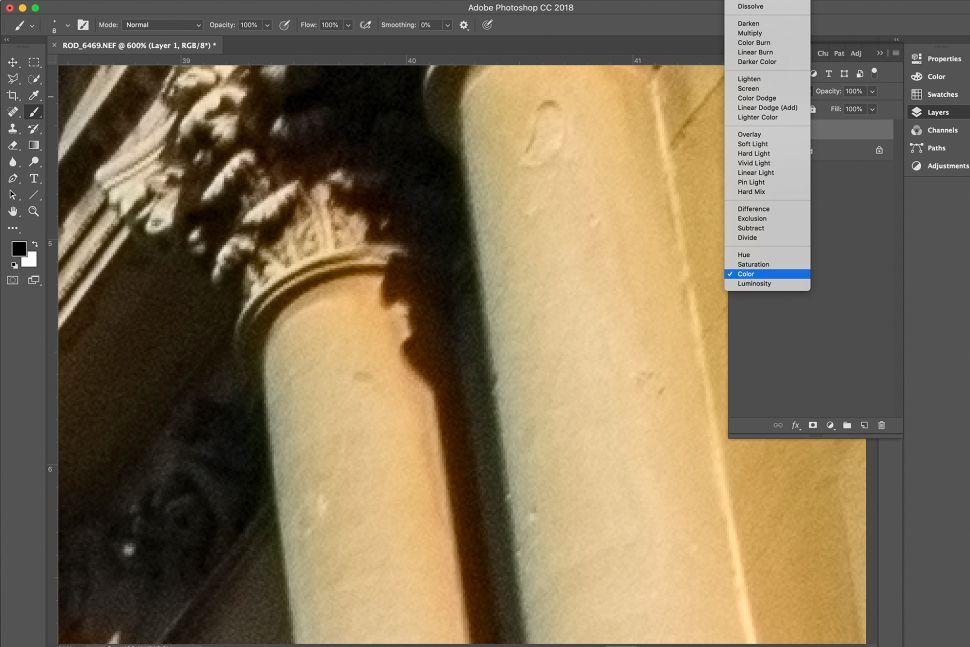
Assuming your blurred layer is still selected, click the Layers panel's Blending Modes drop-down menu. By default, this will be set to Normal, but you'll want to change it to Color. Your image will now appear sharper and the chromatic aberration will either be eliminated or significantly reduced in saturation.

(Image Credit: Future; DigitalCamera)
3. Make a mask
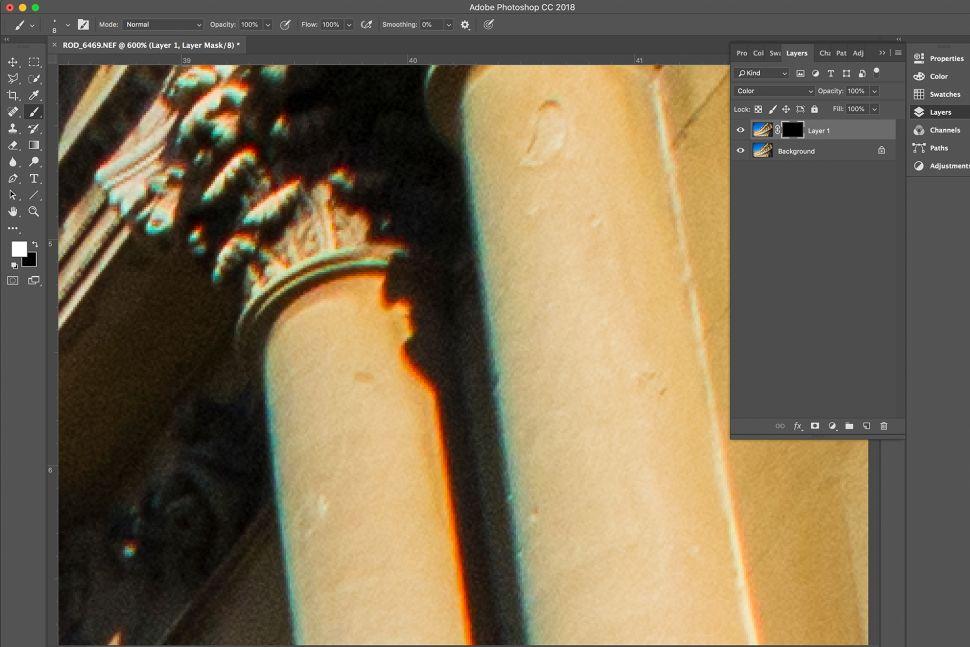
Regrettably, you may notice that the saturation of other areas of your image has been decreased. The most effective way to address this is to mask the layer and remove the color fringing selectively. This is accomplished by selecting the Add layer mask icon at the bottom of the Layers panel and pressing Cmd/Ctrl + I to invert it.

(Image Credit: Future; DigitalCamera)
4. Brush it away
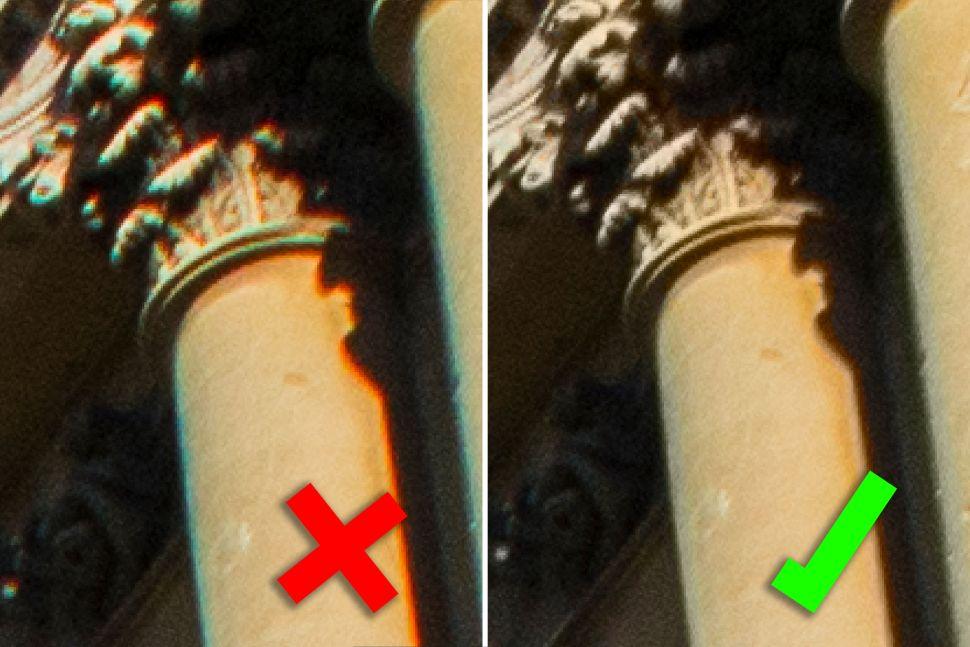
Select the Brush tool and a soft white brush from the drop-down menu. You can now paint over areas of chromatic aberration to reveal the layer with the Color blending mode. If you veer too far from the path, simply switch to a black brush and paint to restore your original layer.
Courses and Certification
Adobe Photoshop Course and Certificate

