How To Clean Thermal Paste Off CPU Safely And Reapply
How to Clean Thermal Paste Off CPU Safely and Reapply
Thermal paste might not be at the forefront in discussions about PC components, but it still plays a vital role in ensuring your rig can function at its full potential.
Without thermal paste, your CPU is vulnerable to overheating. This can cause a whole host of performance problems and even shorten your computer’s lifespan.
After my CPU’s thermal paste dried out, I experienced a drastic drop in performance when using virtually any program, despite my rig’s specs being always far above the minimum requirements.
If you too are experiencing similar issues, chances are, it’s time to reapply the thermal paste. In this in-depth guide, we’ll go over exactly how to clean thermal paste off CPU safely and reapply it.
What is Thermal Paste?
Thermal paste is a paste-like substance that is applied to improve heat transfer between the CPU integrated heat spreader (IHS) and the heatsink. Put simply: it helps keep your CPU cool.
The microscopic imperfections of the contact surface as seen below cause air pockets to form between them. This is where the TIM (Thermal Interface Material), or thermal paste as commonly known, comes into play.
It fills up these pockets and creates a uniform heat spreader across the entire surface for an efficient exchange of heat from the CPU to its heatsink.

How Often Should You Clean Thermal Paste off CPU and Reapply?
You typically need to reapply thermal paste once every 3 to 5 years, depending on the tasks you use your computer for, and the quality of the original thermal paste. There are a few other reasons why you might need to reapply it, including:
- If the original thermal paste was applied poorly.
- Your CPU is running at higher than normal temperatures.
- You’re removing the CPU cooler (e.g. for cleaning) or replacing it.
How to Clean Thermal Paste off CPU and Reapply: A Step-by-Step Guide

Don’t worry; you won’t have to navigate the confusing realm of your computer’s hardware alone. Here, we’ll guide you through the process step-by-step.
Get Your Supplies Ready
It’s essential to make sure you have the appropriate supplies at the ready. You’ll need the following:
- 90% or higher isopropyl alcohol. Ideally 99% – it’ll evaporate much quicker. You can also buy a dedicated thermal paste cleaning product.
- Thermal paste. Below, we cover the key factors to consider when buying a thermal paste.
Some dry microfiber cloths.

You should also make sure your workspace is clean (no lint, dust, or debris).
Remove the CPU Cooler
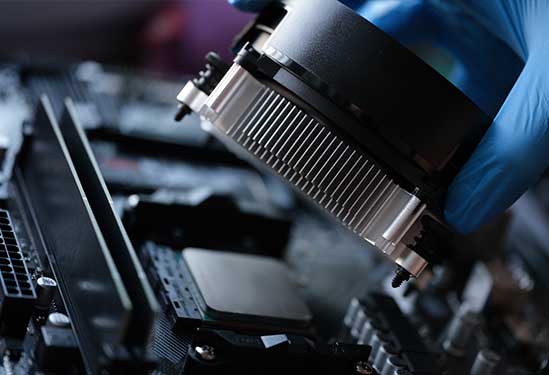
Unsurprisingly, to access the CPU, you’ll need to remove the CPU cooler first.
Here’s how to Remove CPU cooler:
- First, let your computer run for around 15 minutes. This will make it easier to remove the CPU cooler, since it’ll soften up the thermal paste; cold thermal paste is much more likely to keep the CPU and heatsink cemented together.
- Now switch off your computer and unplug everything, including the CPU cooler power cord.
- Loosen the cooler’s bolts/clips – refer to the cooler’s manual if you’re unsure how to do this.
- Gently twist the cooler back and forth until it becomes loose. During this process, make sure not to yank or pull up on the heatsink – this can potentially damage the CPU pins.
- Non-stock coolers with/without 3rd party vendor badges may have different mechanisms, and are usually not that difficult to remove. Refer to their manufacturer’s manual, or a removal video of the same model on YouTube.
- Once loose, the heatsink should easily come off.
Heatsink still stuck after all your efforts? Run your computer again, but this time for around an hour or so.
Clean Thermal Paste off CPU

Here, we’ll go over how to clean thermal paste off your CPU:
- Using a dry microfiber cloth, gently rub at the old thermal paste. This will help to remove any “loose” chunks.
- Apply a small amount of your chosen solution (isopropyl alcohol or thermal paste cleaner) to the microfiber cloth.
- Now, wipe the CPU from top to bottom until there is no visible thermal paste. Do so gently and slowly, otherwise it could potentially damage the CPU.
- Make sure to also wipe around the edges.
- Let the CPU dry. The amount of time it takes to dry will depend on the solution used, but we advise waiting for about an hour. If you used a thermal paste remover, its instructions should say how long you need to wait.
Don’t forget to clean off any thermal paste stuck to the heatsink as well (use the same process).
Reapply Thermal Paste
Next up, you’ll need to reapply the thermal paste. Make sure to read over your thermal paste’s instructions first. Some may require you to take a different approach, so it’s important you check this before applying.
You should also ensure you know how to reattach the CPU cooler.
Now, follow these steps:

- Slowly squeeze out a pea-sized amount of thermal paste directly onto the center of your CPU.
- Carefully place the heatsink back on the CPU. Make sure to place it as flat as possible; this will allow the paste to spread evenly.
- Affix the CPU cooler. Hold it firmly and don’t move it.
Tips for Applying Thermal Paste
If the cooler slips or slides, you’ll have to start over again. This is because once the heatsink moves, it breaks the seal and introduces insulating air pockets, ruining the whole purpose of the thermal paste.
It’s vital to get the amount of paste right – too little, and it won’t sufficiently cover the CPU. Too much, and the paste will likely spill onto the motherboard.
How to Clean Thermal Paste off CPU Socket Pins

If for whatever reason the thermal paste ends up on your CPU socket pins, it is possible to clean them without causing damage.
We’ll cover the steps below, but please keep in mind that this process is not without its risks. The pins are exceptionally fragile, and applying too much pressure can ruin them.
We advise leaving it to a professional, especially if you have no experience working with delicate components like this!
You will need:
- A soft-bristled toothbrush.
- 90%+ isopropyl alcohol.
- A dry microfiber cloth.
How to Clean Thermal Paste off PGA Socket
Follow the steps below if you have a Pin Grid Array (PGA) type socket. If you have a Land Grid Array (LGA), skip this and follow the steps further down.
- Dip your soft-bristled toothbrush into the alcohol solution.
- Determine the direction the pins are pointing toward.
- In the same direction, brush the toothbrush across the pins which have thermal paste on them. We can’t stress this enough: brush extremely lightly (apply little to no pressure) and in a straight line.
- Once the brush has picked up some thermal paste, wipe it off on the microfiber cloth.
- Repeat the process until a good amount of the thermal paste is gone – you don’t need to remove all of it, just enough to allow for a proper connection.
- Let it dry for around an hour.

How to Clean Thermal Paste off LGA Socket
To clean a Land Grid Array (LGA) type socket, do the following:
- Using an isopropyl alcohol wipe, gently wipe the thermal paste off the surface. Wipe in a straight line.
- Repeat this process until the thermal paste is gone, using a new wipe each time.
- Leave it to dry for around an hour.
Factors to Consider When Buying a Thermal Paste
There’s a wide array of thermal pastes available on the market, so it can be a struggle to know which one you should go for. Here are a few factors to keep in mind:
Viscosity
A thermal compound with high viscosity will make for easy application and adhere better.
Thermal Conductivity Rating
This rating reveals how effective the paste is at transferring heat. Usually, the higher the number, the better.
Volume
You only need a small amount if you’re just using the thermal paste for the CPU. Plus, you won’t be able to reuse it – opened thermal paste will expire before you next need to reapply it.
Type
There are two types of thermal paste: conductive and non-conductive. PC Gamer has a useful guide on each type’s pros and cons. As a general rule of thumb though, stick to the non-conductive type if you’re inexperienced.
Conductive metallic thermal pastes can short your system if they spill on the motherboard. However, their thermal conductivity is magnitudes higher, like their prices, and are therefore targeted at extreme builders or record-chasing overclockers.


