
How To Configure BitLocker On Windows 11 Pro
The Step by Step Process Of Configuring BitLocker on Windows 11 Pro
The following are the steps to configure BitLocker in Windows 11 Professional:
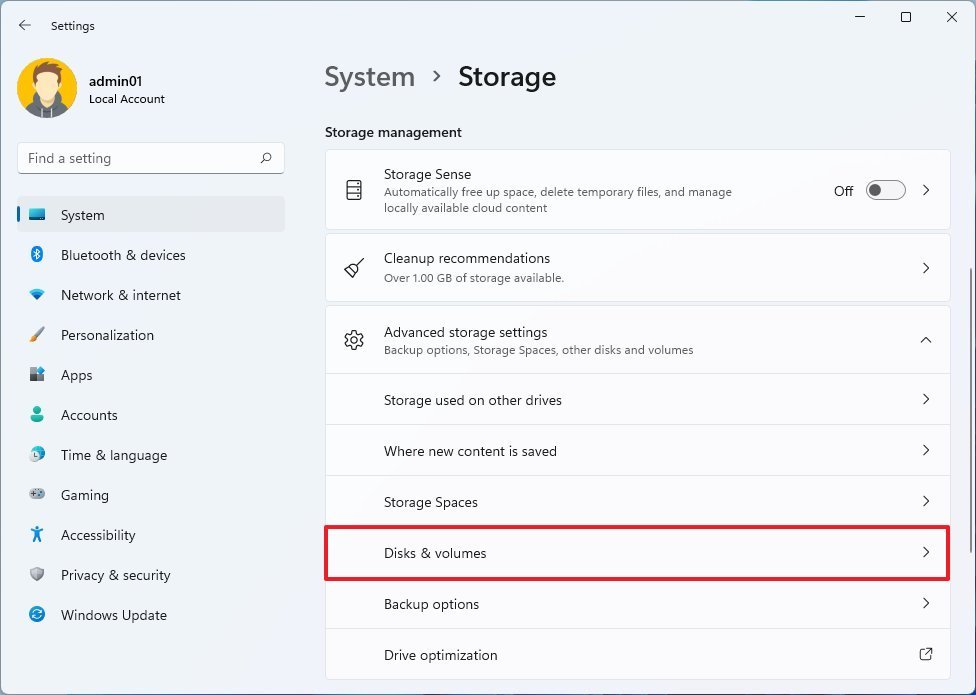
1. Navigate to the Settings menu.
2. Select the storage option.
3. Navigate to the "Storage management" section and select Advanced storage settings.
4. Select Disks and Volumes from the drop-down menu.
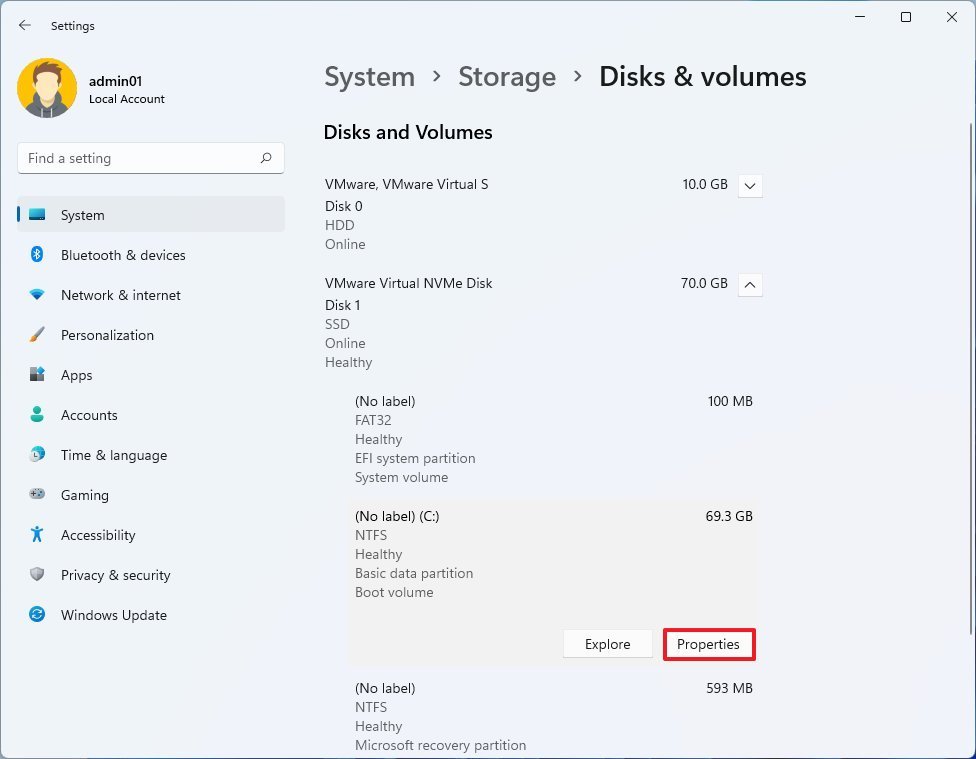
5. Locate the drive that contains the encrypted partition and click on it.
6. Encrypt the partition by selecting it from the drop-down menu.
7. Click on the Properties button.
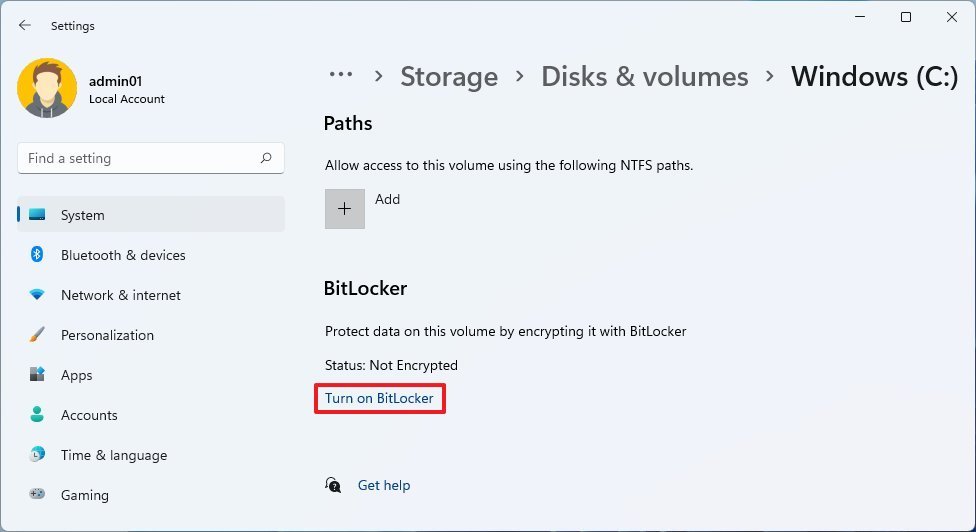
8. Select the Enable BitLocker option from the drop-down menu.
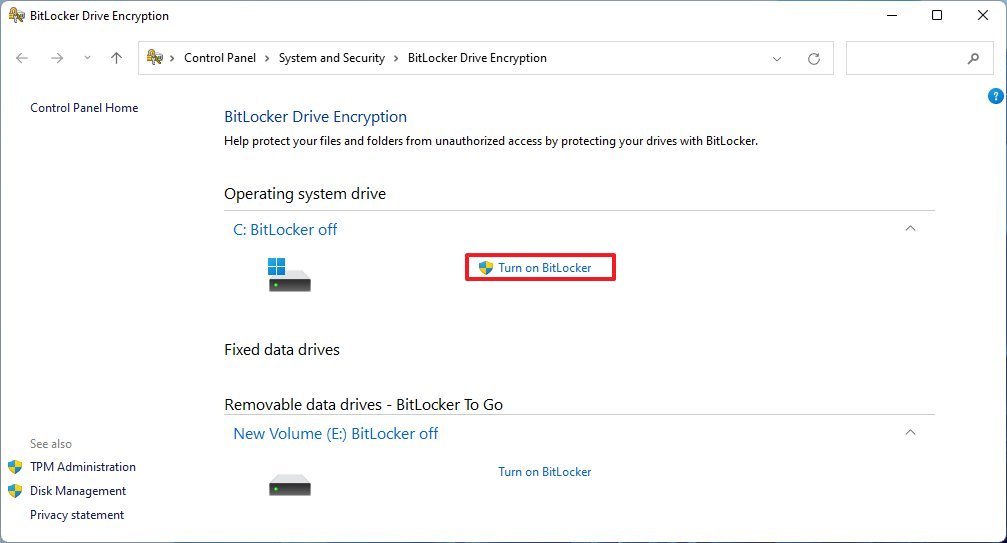
9. Once more, select the BitLocker option from the drop-down menu.
10. Select a backup option for the recovery key, such as Save to your Microsoft account, and click Save.
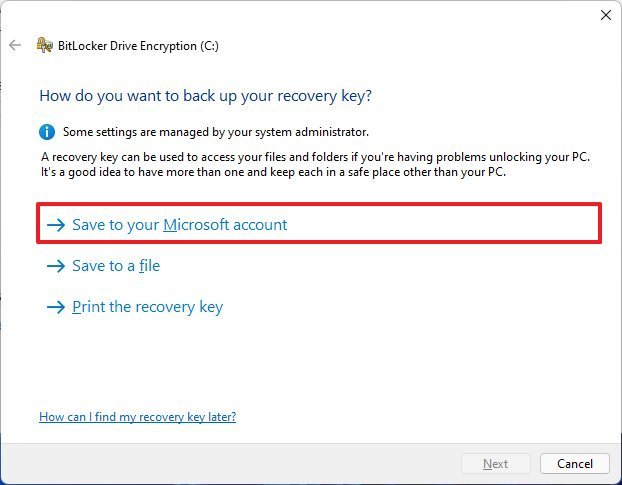
A quick reminder that the recovery key is always accessible through your Microsoft account. Aside from that, the option for online storage is only available if the account is linked to a Microsoft account.
Then press the Next button to continue the process.
12. Select the option to encrypt only the disk space that has been used.
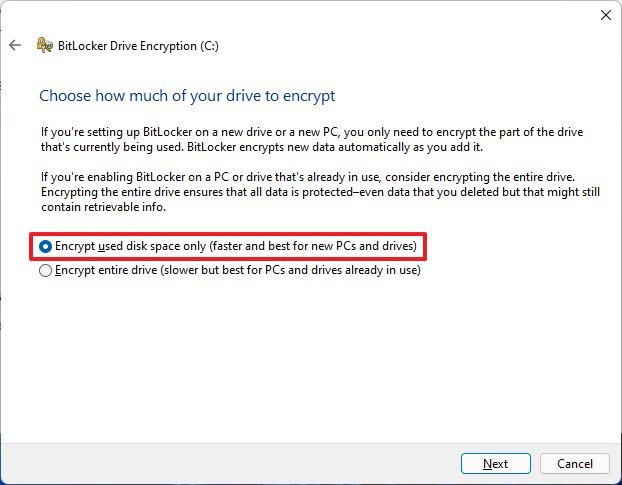
13. Following that, click on the Next button to proceed to the following page.
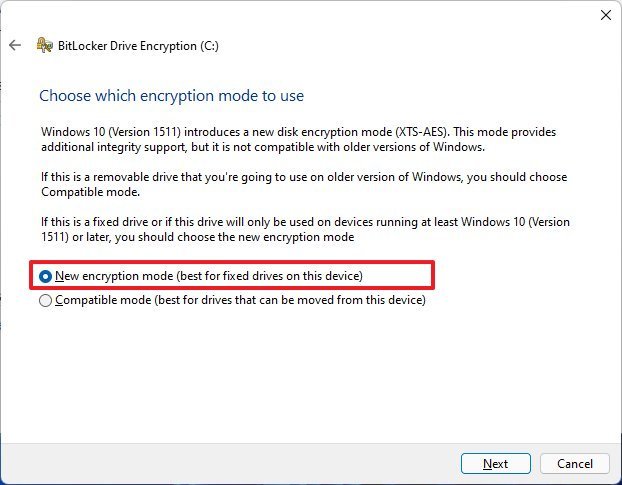
14. Select the option for a new encryption mode from the drop-down menu.
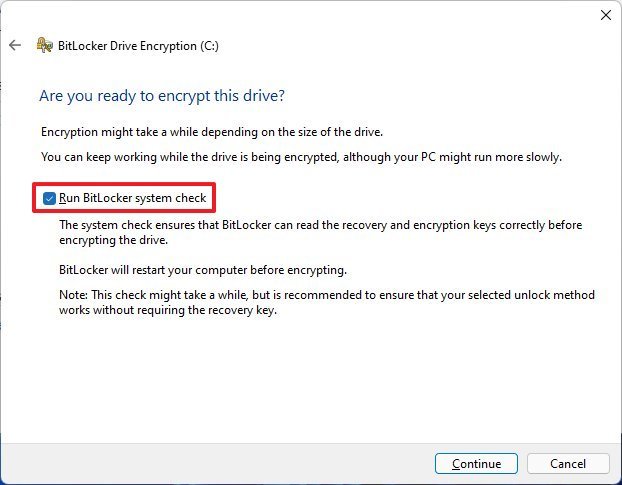
15. The option to run a BitLocker system check can be found.
16. Select the Restart now option from the drop-down menu (if applicable).
Following completion of all of the steps, the system will begin encrypting the information on the hard drive.
When it comes to primary storage, external USB hard drives, and removable data drives, "BitLocker Drive Encryption" is the most commonly used option. However, "BitLocker To Go" can also be used to encrypt other drives such as secondary storage, external USB hard disks, and removable data drives.

