
How To Disable Telemetry And Data Collection In Windows 10
4 Ways to Disable Telemetry and Data Collection in Windows 10
When we upgrade to Windows 10 or install Windows 10 for the first time, the Telemetry and Data Collection feature is enabled. Due to the fact that this is an auto-enabled feature, it collects and sends all types of user activity to Microsoft.
Though Microsoft claims that the data collected is used to improve the overall user experience and Windows functionality, users are more concerned with their privacy due to the increasing number of data breaches occurring globally.
Users must want this feature disabled if they want their data to be safe and secure. Regrettably, Microsoft has not provided a straightforward method of disabling it. However, it includes several options in the built-in Settings app for disabling telemetry and diagnostic data collection. We will discuss how to disable Windows 10 telemetry using the methods listed below.
Here are 4 Ways to Disable Windows 10 Telemetry:
Method 1: Set Diagnostic and Usage Data to Basic:
This option limits the collection of User Data in Windows 10; it does not disable Telemetry and Data Collection.
1. Select the Start button, followed by the Settings icon.
![]()
2. In the Settings window, select the Privacy option.
![]()
3. In the next window, from the left panel, click the Diagnostics & Feedback tab and then set Diagnostics and usage data to Basic.
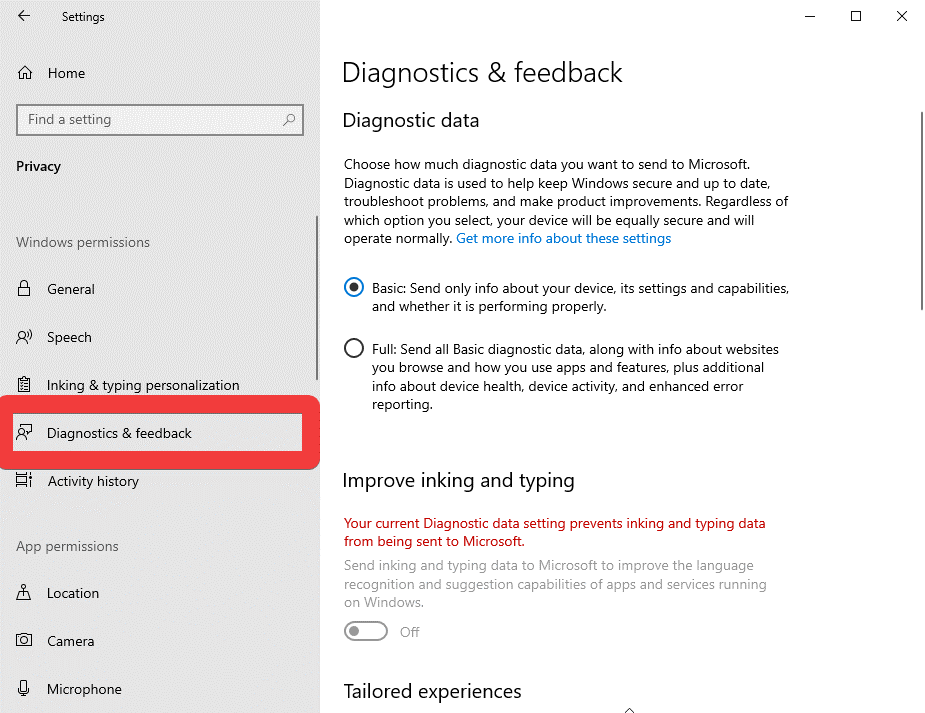
This will limit the amount of data sent to Windows, reducing the likelihood of users' data being compromised.
On the same Privacy tab, you'll find additional options for disabling telemetry in Windows 10 to prevent data collection.
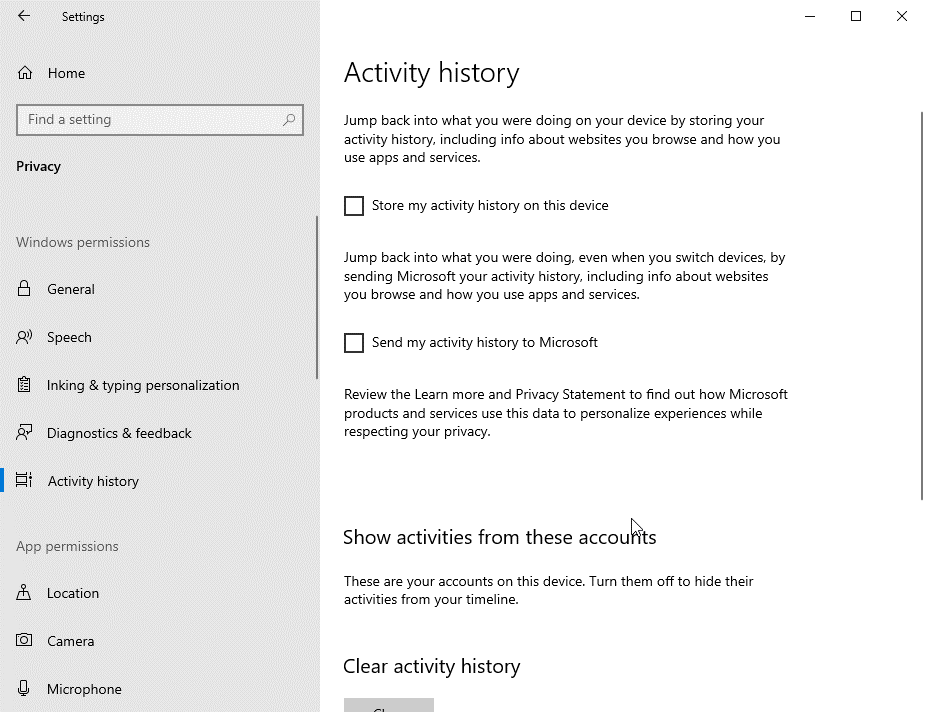
- Now, navigate to Activity history and disable the options listed here. Uncheck the boxes next to – Save my activity history on this device and – Send my activity history to Microsoft.
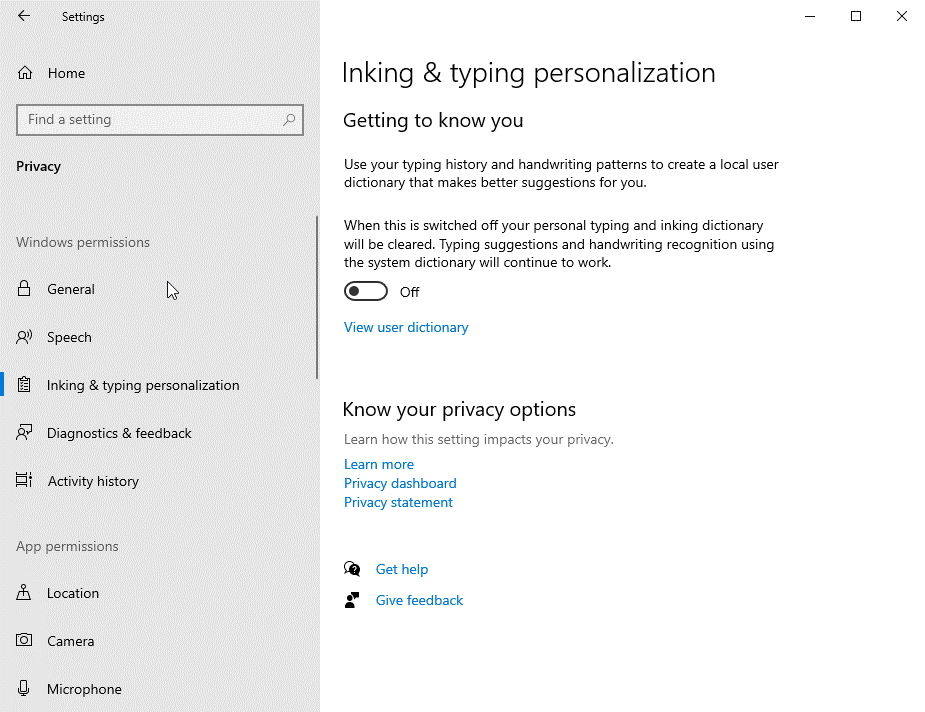
- Now navigate to Personalization > Inking & Typing and disable the toggle switch for typing suggestions.
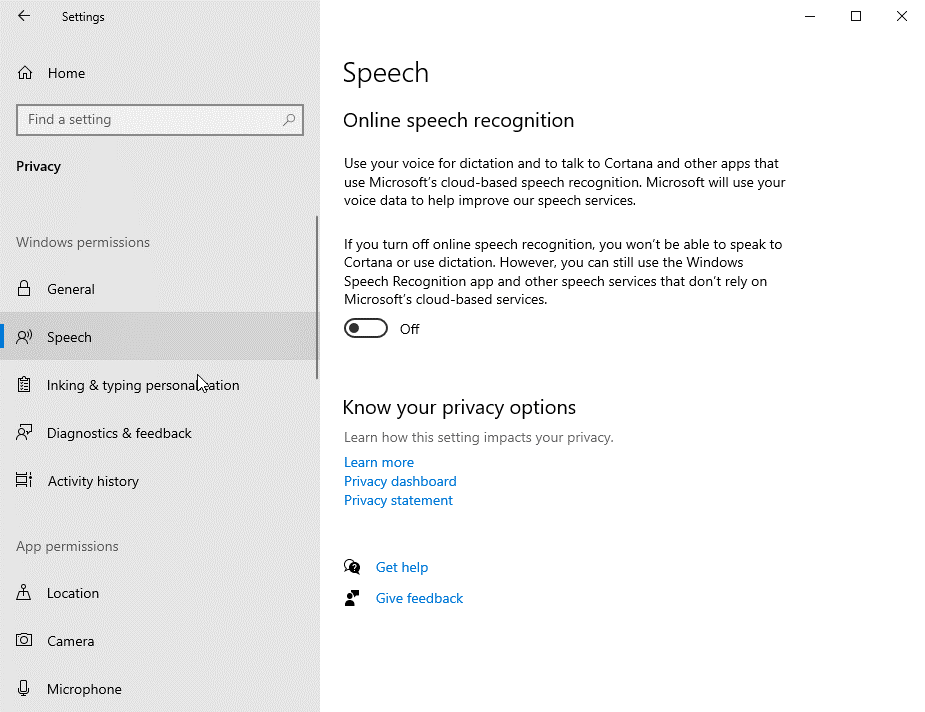
- Similarly, navigate to Speech and disable the toggle switch that prevents Microsoft from periodically collecting voice samples.
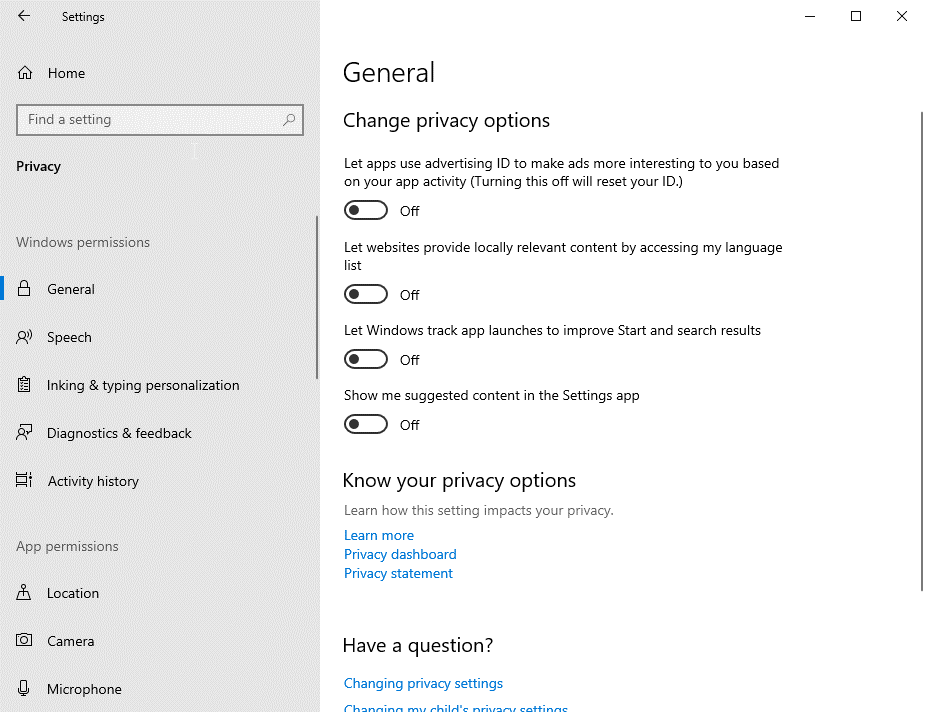
- Now, on the General tab, disable all options that collect and send user data to Microsoft.
Method 2: Disable Telemetry and Data Collection in Windows 10 Using Registry Editor:
If you do not wish to provide any information to Microsoft, you can disable telemetry and data collection by following the steps below.
Note: We strongly advise against modifying any registry entries because they are associated with Windows or critical system files. If your registry is incorrectly modified, it may result in unexpected problems. If you choose to proceed, make a backup of your registry. To begin, open Registry Editor and navigate to File>Export. Save the file to a location on your computer that is easy to find later. To restore your registry, navigate to File>Export and double-click the identical file.
As a result, please exercise extreme caution when using the Registry Editor. You can accomplish this by following the steps below:
1. In the Windows 10 search box, type regedit and press enter. Alternatively, press Windows Key + R to open a command prompt and type regedit, followed by OK.

2. From the sideboard pane, navigate to the following trees.
HKEY_LOCAL_MACHINE\SOFTWARE\Policies\Microsoft\Windows\DataCollection.
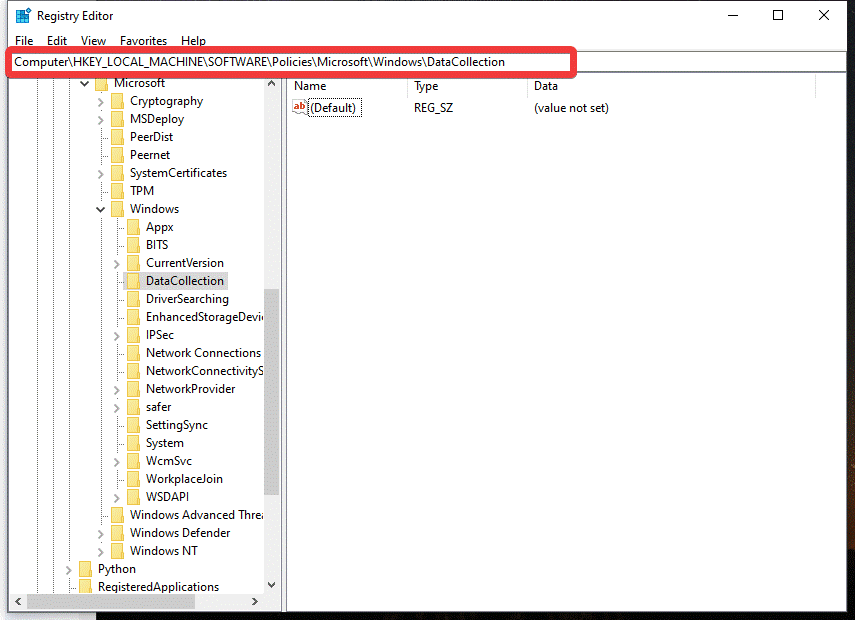
3. Right-click in a blank space in the right panel and select New, then DWORD value (32-bit). Give it the name AllowTelemetry.
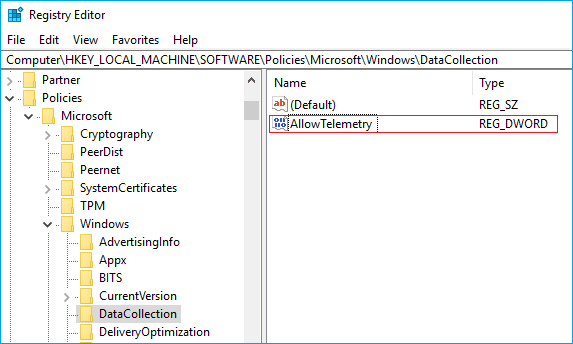
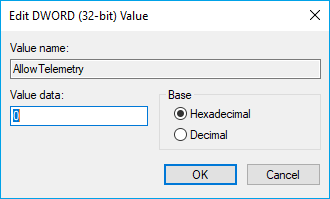
Double click on the AllowTelemetry and set the value to 0 and click on OK.
Method 3: Disable Connected User Experience and Telemetry Service:
After disabling telemetry and data collection through the Registry Editor, you must disable the "Connected User Experience" and "dmwappushsvc" services. This is required to completely disable Telemetry on your Windows 10 computer. To accomplish this, follow the steps below:
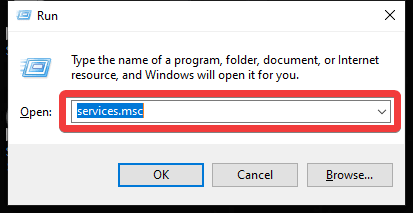
1. To open the Run command window, press the Windows + R keys. Type services.msc in the Run command window and click the OK button.
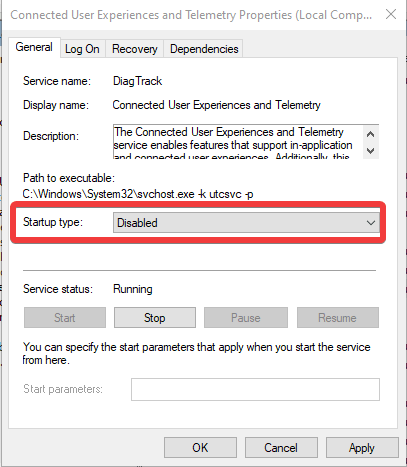
2. Scroll down to and double-click on Connected User Experiences and Telemetry in the Services window.

3. On the following screen, change the Startup Type to Disabled to disable Connected User Experiences and Telemetry. Now, click the Apply button to save your changes.
4. Now find another service named dmwappushsvc service in the Services window and double click on it.
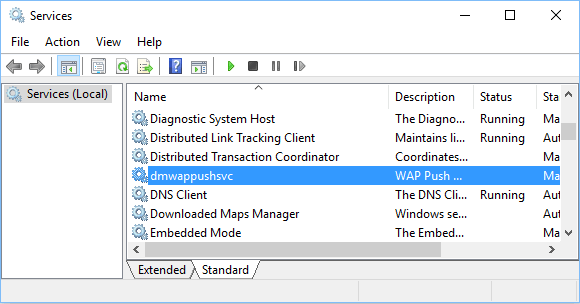
5. Here, set the Startup Type to Disable and click Apply to disable the dmwappushsvc service.
Method 4: Using Group Policy
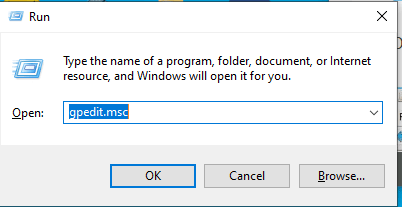
1. Using the run command, open Group Policy. To open Run Command, press Windows Key + R and type gpedit.msc. To proceed, click OK or press Enter.
2. This initiates the creation of a new window titled Local Group Policy Editor. You may want to look for –
Computer Configuration> Administrative Templates> Windows Components> Data collection and Preview Builds.
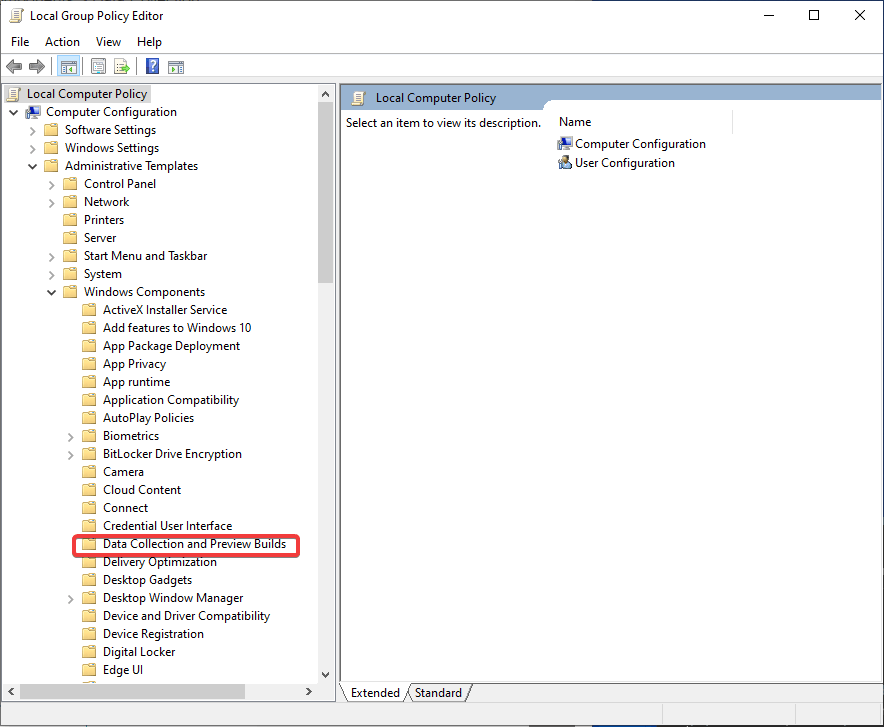
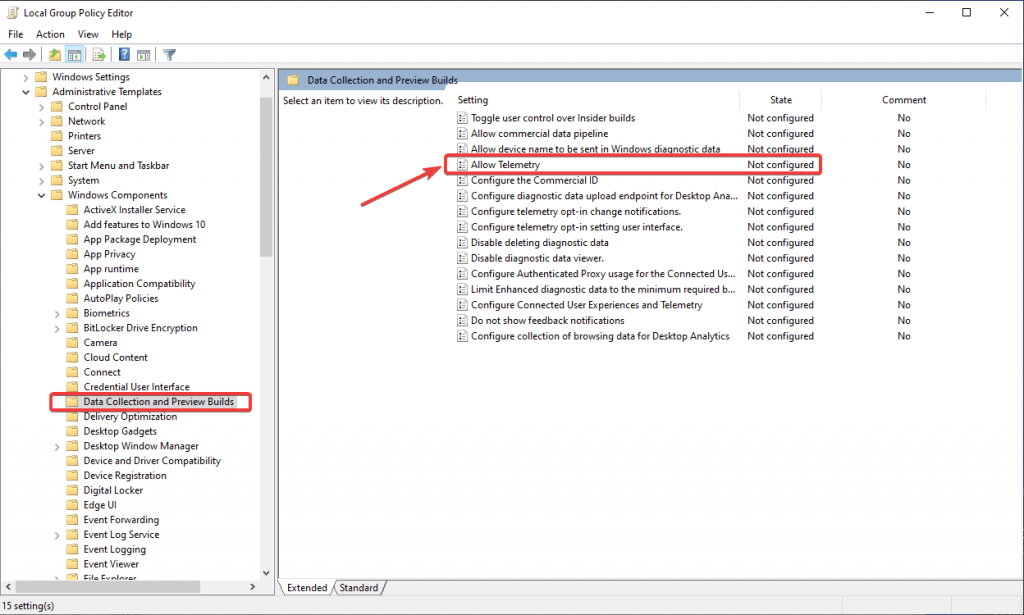
3. Double-click Data Collection and Preview Builds to bring up the right pane with options. Double-click Allow Telemetry now.
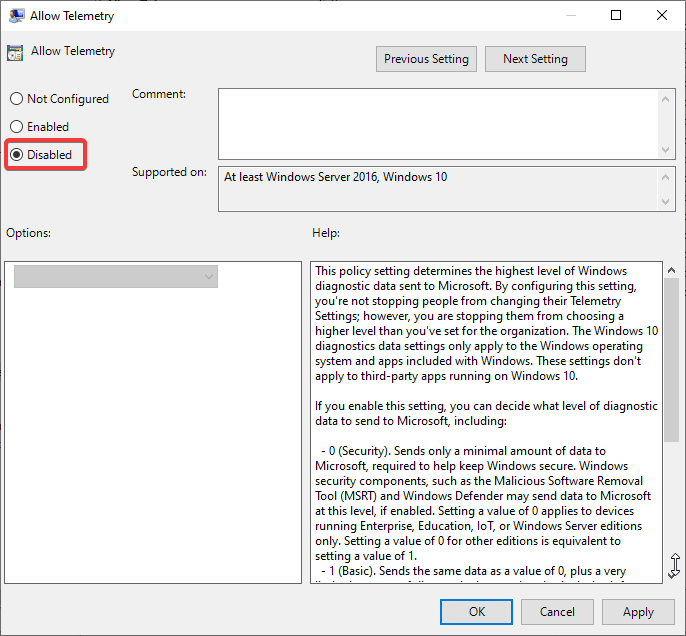
4. In the Allow Telemetry section, select the option Disabled. To save the changes, click Apply.
Source: WTG

