
How To Install Android On Your Windows Tablet
Windows tablets are becoming more popular. But if you’re looking for a bigger selection of apps, Android is the answer. heres How to Install Android on Your Windows Tablet.
What Tablet Are You Using?
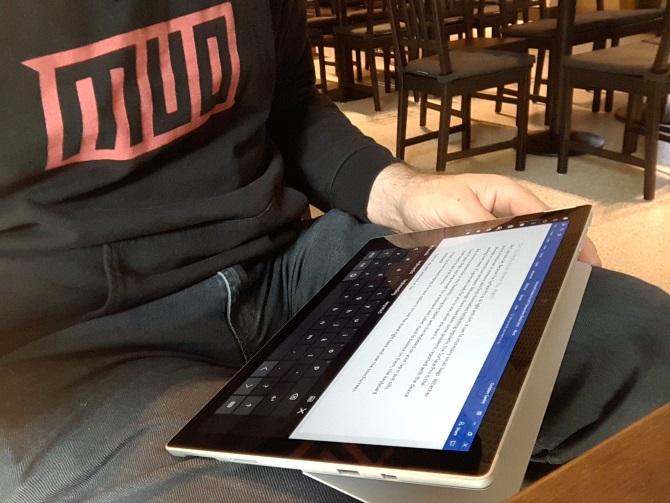 Image Credits: makeuseof
Before going further, you need to, be aware that Android can only be installed on a standard 32-bit or 64-bit Windows tablets. Those that use make use of ARM processors (such as the much older Microsoft Surface RT) are not compatible.
Meanwhile, the way to install Android on your Windows tablet would differ from device to device. But, the general approach is the same.
Windows 8 tablets are desperate for an upgrade to a usable operating system. In many cases, Windows 10 is the solution. However, the lack of applicatuions or the ever increasing complexity of Windows 10 may stop you from upgrading.
For many, the Android OS is the only way to keep making use of the old but perfectly good tablet hardware.
Here's What You Would Need to Install Android on a Windows Tablet
- Your Windows tablet, plugged into a power source
- A blank USB flash drive of 16GB or more
- Second USB flash drive with the Windows installer loaded on it (in case of problems)
- USB flash disk writing software (we recommend Etcher)
- USB keyboard (a mouse is optional)
- A USB hub so you can connect multiple devices to your tablet at once
- The right version of Android for your system
When it comes to the area of installing Android, and the first option that you should try out is the Phoenix OS.
Intel also manages and maintains some Android images for Windows systems. You will find these as part of their open source Celadon project, that is available to download on GitHub.
Before going further, search the internet for that are specific to your tablet. It’s very important to have a direct, step-by-step reference to make sure that you don’t make any mistakes that could wipe your system drive. You certainly would want to avoid any errors that could leave your computer unbootable.
Why Install Android on a Windows Tablet?
Windows has a usable User Interface in both touchscreen and tablet mode, but the Microsoft Store’s application selection is very modest.
Note, however, that you will be restricted to applications that support x86-compatible systems. These are growing in large numbers, but don’t expect to run every app that is found in the Play store.
Configuring Your Windows Tablet for Android Installation
You cannot just install another operating system on a device that is designed for Windows without making a few tweaks to the system setup.
First of all, you will need to make sure that your Secure Boot is disabled. Go to Settings > Update and Recovery > Recovery and choose Restart Now under the Advanced Start-up. From here, make use of your arrow keys to select Troubleshoot, then Advanced Options > UEFI Firmware Settings.
In this place, locate the Security tab in the left-hand menu and set a Supervisor password. Once you have added that, open up the Boot, look for the the Secure Boot option, and set it to Disabled.
With that done, hold down the Power button to restart, then hold down the Windows button as well until the screen of your PC comes back on. This allows for a quick shortcut back into the BIOS screen, where you should make sure that UEFI Mode is selected.
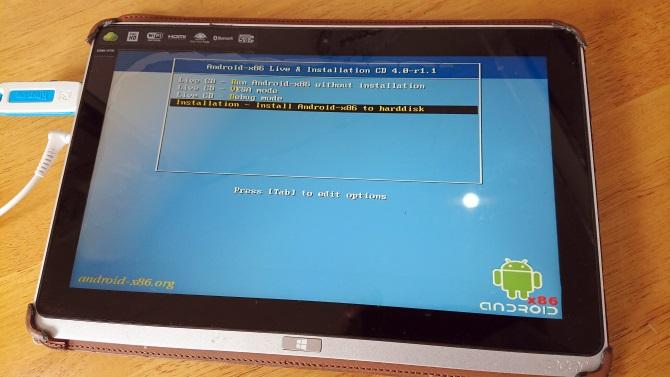 Image Credits: Makeuseof
Next, switch the tablet off, and connect the USB hub directly to the USB port. Do not use a docking station.
With the keyboard and the USB stick connected to their specific hub, boot up your tablet, hit F12. In the boot menu that proceeds, make use of the arrow keys to select the USB drive. When you need to make certain selections (such as enabling the dual boot), use your system keys.
Different versions of the Android installer have their own steps. In most cases, the dual boot option should be selected. It’s often not worth it to completelyremove Windows as the bootloader is needed for Android to boot.
If all the steps above go according to our plan, when next you boot up the tablet you should see be greeted with a boot menu, where you can select between Android and Windows.
Alternative Ways to Run Android Apps on Windows
If your main reason for installing Android on your Windows tablet is to just use applications, emulation is often a simpler solution. You can select from several tools to run Android apps in this way, and they includes:
- NoxPlayer: Probably the best Android emulator for Windows.
- BlueStacks: Ideal for fans of Android gaming.
- Andy: Includes features for game and app development.
Note that these will only run as well as the hardware on your Windows machine allows.
Turn Your Tablet Into Android With a Virtual Machine
Installing Android on a tablet can be tough. It might take a moment to find an image that is suitable for your device, for example. In the worst scenereos, there might not even be a compatible version of Android for you to make use of.
Don’t give up. If Android emulation does not suit you, consider using a virtual machine instead.
Various tools such as VirtualBox or VMWare Player can run a virtual environment, upon which you install an Android operating system. This might be the operating system that you downloaded earlier to run on your specific tablet model, or it could just be Phoenix OS.
Either way, they are a much cleaner option than dual booting or completely taking away Windows. Simply boot Windows, launch the virtual machine, and run your Android OS...trust me, its that easy.
You can also check how to on BetWinner login.

