
How To Obtain Trustedinstaller Permission To Modify Files
How to Obtain Trustedinstaller's Permission to Modify Files
You might believe that as an Administrator, you have complete control over your Windows. When you attempt to delete certain files from your computer, however, a Folder Access Denied message will appear, stating, "You require permission from TrustedInstaller to make changes to this folder." It appears as though you still do not have final say over your operating system.
Microsoft created an NT SERVICE\TrustedInstaller account in Windows to protect core files and prevent them from being deleted. As a result, if you attempt to modify or delete any of these files, an error message stating "You require permission from TrustedInstaller" will appear, preventing you from proceeding.
Here is how to obtain the TrustedInstaller privilege
1) Right-click on the file or folder that you wish to modify or delete and choose Properties.

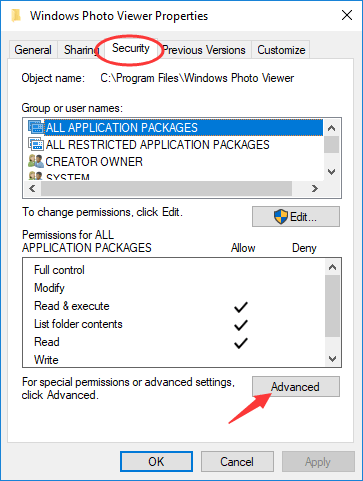
2) In the Properties window, select the Security tab and then Advanced.
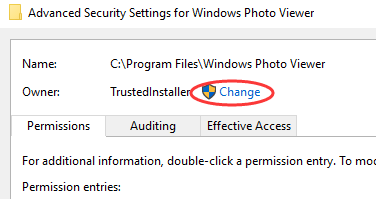
3) In the Advanced Security Settings window, we're going to change the Owner. On Windows 10, click Change next to TrustedInstaller's Owner: TrustedInstaller.
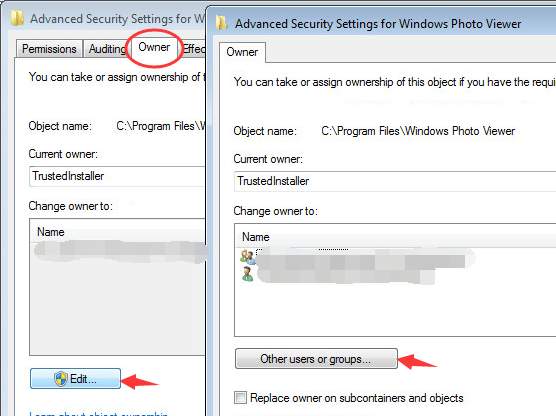
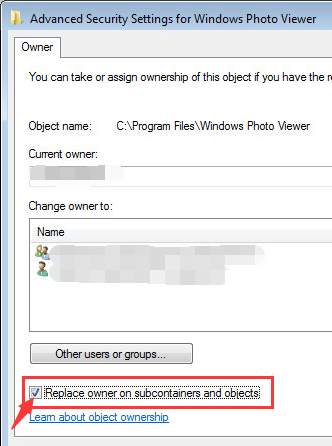
However, on Windows 7 and earlier versions, you must select the Owner tab and then click Edit. Also, in the window that appears, click on Other users or groups.
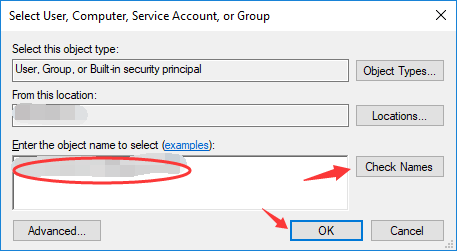
4) In the pop-up window, type your computer's user name into the box and click the Check Names button. Windows will check and complete the full object name automatically. After that, click OK.
5) Check the box next to Replace owner on subcontainers and objects if you want the ownership changes to be applied to all subfolders and files. Then click OK to close this window and return to the Properties window.

Replace owner on subcontainers and objects is located beneath the Other users or groups button in Windows 7.
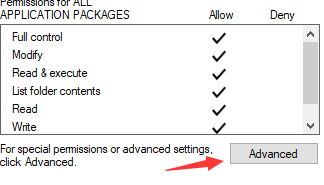
6) Click Advanced once more. Then, under Permission entries, click the Change permissions button.
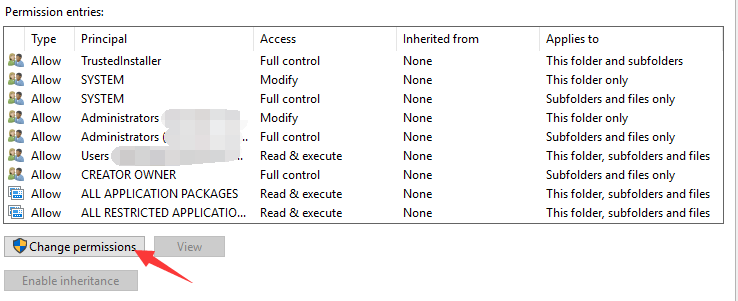
7) Select Add. Select a principal from the Permission Entry window. A window identical to the one that appeared in step 4 will reappear, and you must repeat step 4.
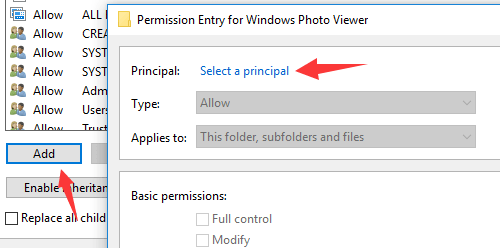
In the Basic permissions section, check the box next to Full control and click OK.
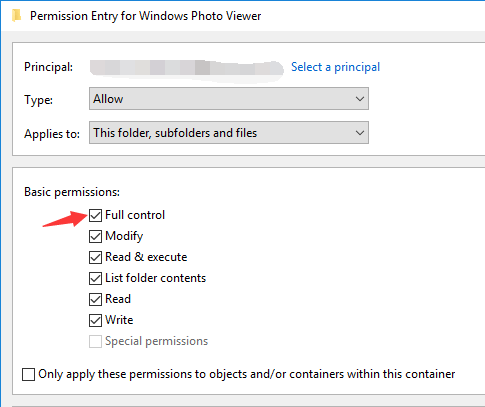
Check Substitute inheritable permission entries from this object for all child object permission entries. Following that, click OK all the way to the end.

To view the Add button in Windows 7, click on the Change Permissions button on the Permissions tab. Repeat step 4 by clicking on that. After that, click OK and check the Allow box for Full control.
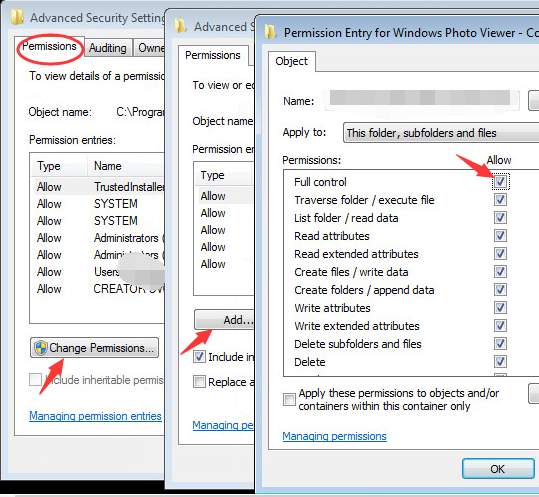
Check Replace all permissions on child objects with inheritable permissions on this object. Then click OK all the way to the bottom.

8) At this point, you can delete the file for which you just changed ownership without encountering the "You require permission from TrustedInstaller" message.
Likewise, you can apply these changes to other protected files to regain complete control over them. However, you should always be aware of the potential consequences of exercising complete control and know what you are doing before taking any further action.
Image Source: driver easy

