
A Step By Step Guide To Solar Installation At Your Residence
 Rebecca
One of the essential commodities every residence should have is electricity. It helps power electric appliances like fridges and AC. Nevertheless, electricity is getting pricey each day due to the increasing cost of production.
The government and other private sectors have thus carried the initiative to deliver a cheaper and more sustainable way to provide electricity. Consequently, solar power is becoming an ideal energy source for most homes.
Solar power is usually converted to electricity through solar panels, which need installation. You can choose to do the installation yourself or hire a professional.
Here is a step-by-step guide to solar installation at your residence.
Step 1: Assemble all the Solar Power Components
The first crucial step in a solar installation is to gather all the fundamental components. Before starting the installation, you need four essential components: an inverter, a charge controller, a battery pack, and solar panels.
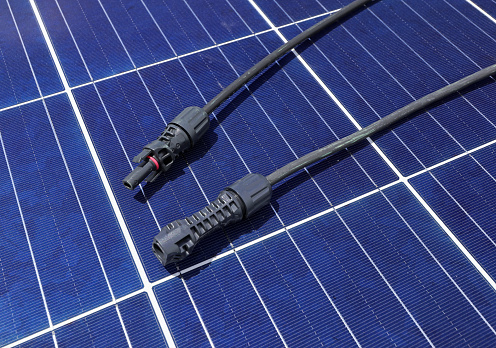
Additionally, you will need an MC4 connector, single-contact electric wires used for connecting solar panels. These connectors are also easy to connect, making the solar installation process trouble-free.
Step 2: Determine Your Power Requirement
Notably, it is vital to calculate and sum up the power requirement in your home before installing solar power. This is a simple process. You only need to list all the home appliances you will use daily—for example, the lights, fun devices, television, fridge, etc. You can also assess the time you use these devices in a day.
What's more, you need to examine the specification chart of each device in your home to determine its power rating and usage duration. Calculate the watt per hour for each appliance by multiplying the power rating and the runtime.
An online grid calculator can help you do this calculation quickly. Sum up all the watts per hour for each appliance to get your power requirement. This calculation helps determine the type and dimensions of the solar panel to install.
Step 3: Choose and Charge the Battery
One major disadvantage of a solar system is that it may fail to provide adequate electricity when the sun is not hot enough or during the cloudy or rainy season. However, a battery helps you to overcome this problem.
A good battery, such as a lithium-ion or lead-acid, helps store solar-generated power used during the night. This guarantees you a steady and reliable energy supply in your home.

Step 4: Install the Inverter
Solar energy generates electricity in direct current (DC) form, while electricity devices use power in Alternating current (AC) Form. An inverter is a device that enables you to use electrical appliances without adapters.
These devices are of different types and power wattages. For example, you can get pure sine-wave, square-wave, or modified sine-wave inverters. Choose one that will meet your needs and serve you effectively.
Step 5: Install the Solar Panels
Before mounting the solar panel, select an ideal location for your panels. It should be on open ground or on the rooftop, where it can receive a maximum supply of solar radiation throughout the day.
Clear off every obstacle that may hinder or cast a shadow on your solar panels. Finding a good location for your solar panels ensures their effectiveness and easy maintenance. Moreover, to fix your solar panels, you need a mounting stand. You can buy one or make one for yourself.
Another crucial thing to do in this step is to do electrical wiring. The solar panels have a junction box containing positive and negative polarity. The junction box is fixed with terminal wires with MC4 connectors for large solar panels.
Before connecting, especially for small solar panels, align the external wires with the junction box. Use the black wire for negative connections and the red wire for positive terminals.
Step 6: Connect the Battery to The Solar Panels
As mentioned, the battery helps store electric power from solar panels used as backups. Once you have installed your panels, connect them to the battery. Some solar panels connect to the battery, so you may not have to connect them.
However, if the solar panel is not connected to the battery, you must make parallel and series connections. Series connection is where you connect one device's positive terminal to another's negative terminal.
On the other hand, in a parallel connection, you connect the negative terminals of one device to the negative terminal of the other.
Step 7: Make Stands for The Battery and Inverter
You need a stand for your inverter and battery to complete your home solar installation. You have the option to purchase or make it yourself. Once you have determined your batteries and inverter's ideal location, make stable stands.
Moreover, connect the controller to the solar system to finish the installation process. Start by connecting the controller to the solar panels, then connect it to the battery. A controller helps to monitor and regulate the battery charge.
The Bottom-Line
The process of installing solar panels is simple. If you feel you need help on any step, always ask for assistance from a professional. Most brands provide a manual containing instructions on installing the solar system, safety measures to observe, and how to maintain it. Carefully read those instructions before installing your solar panel.
You need to consider several factors when buying a solar system. For instance, consider the cost, the equipment required, and the size. Always go for the best brand that will give you quality services.
SIIT Courses and Certification
Also Online IT Certification Courses & Online Technical Certificate Programs
SIIT is on a mission to make technology education and professional training more accessible, so more people can show off their talents and take their tech careers to the next level. All courses are tailored to meet individual specific career needs, leading to Tech Skills Acquisition and Professional Certification.

Jobs Vacancy
The Jobs portal provides you with real time Jobs Opening and Vacancy Updates curated globally. Start applying for your dream job with ease in any location you choose.
Learn More >>
CV Builder
The CV Builder provides you with comprehensive guide and proven steps to take in writing a professional CV including top CV templates to get you started quickly.
Learn More >>
