How To Customize The Kiosk Mode On Windows 11
It is possible to make changes to the current Kiosk configuration or application settings on Windows 11 as needed.
Make Changes to the Kiosk Configuration
The following are the steps to take in order to change the settings for the Kiosk in Windows 11:
1. Start by logging in with the credentials of the administrator.
2. Select Settings from the drop-down menu.
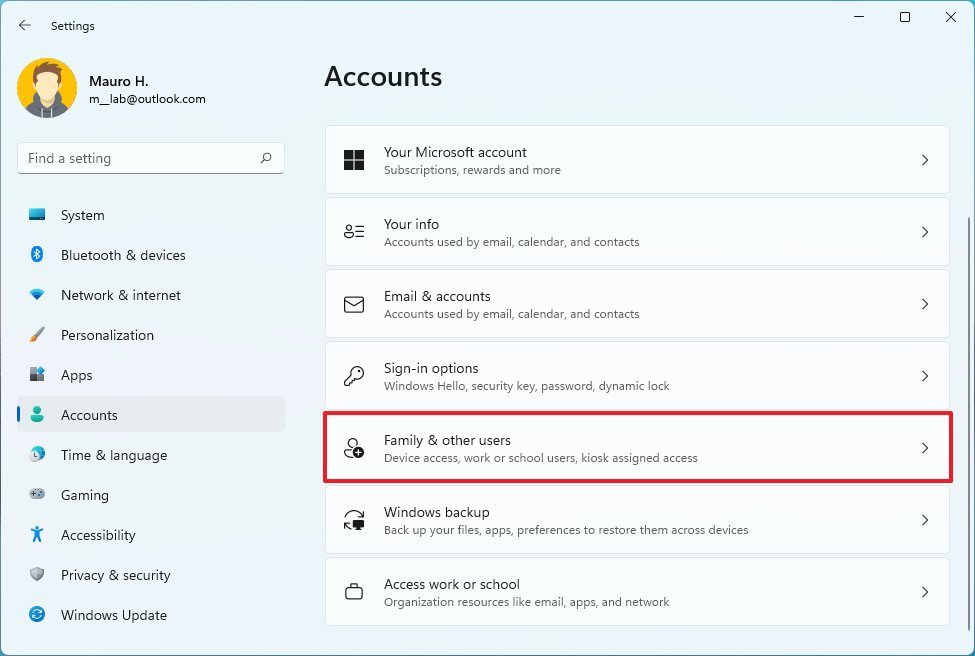
3. Navigate to Accounts.
4. Select the Family & other users page from the drop-down menu on the right.
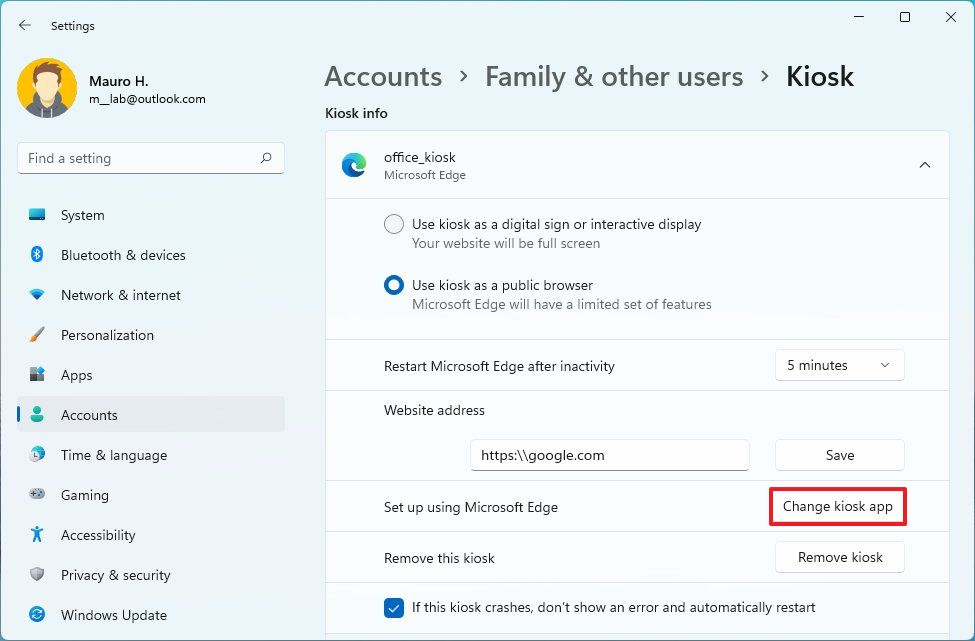
5. In the "Configure a kiosk" section, select the Kiosk (active) setting from the list.
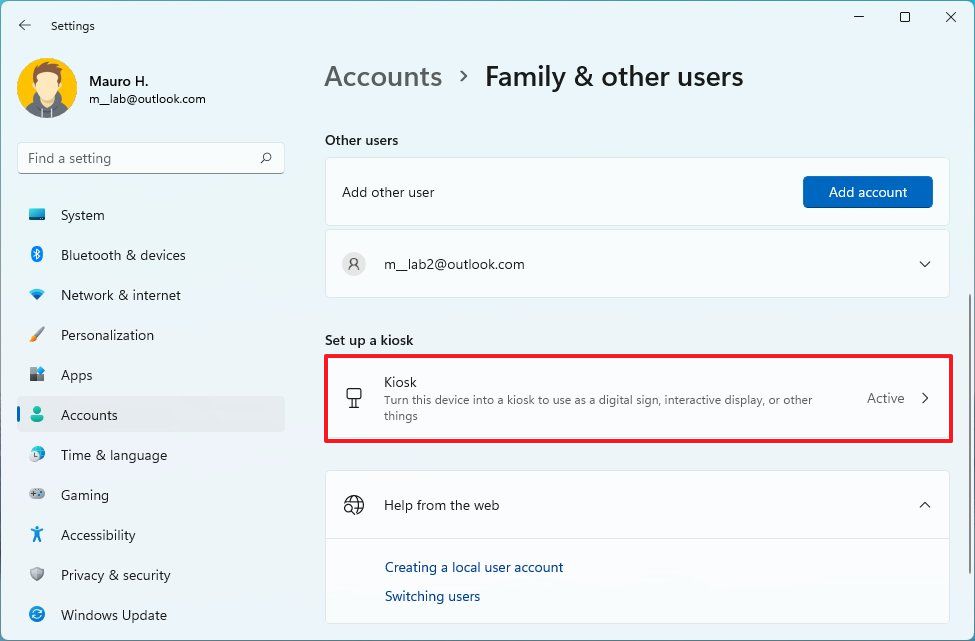
6. Select the application from the drop-down menu.
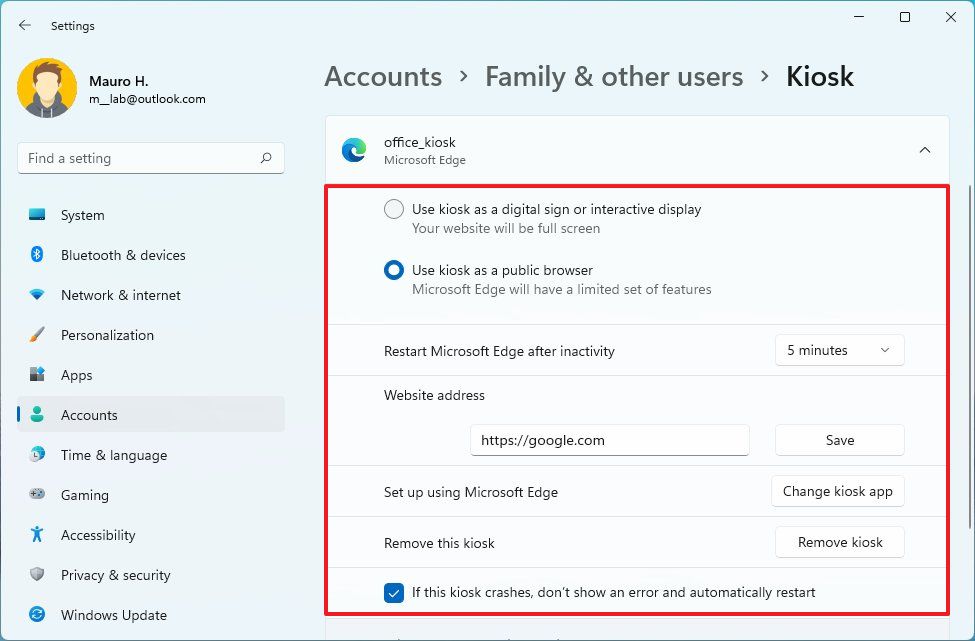
7. Make any necessary adjustments to the settings.
Following the completion of the steps, the new settings will be applied the next time the Kiosk account is loaded onto the computer, and so on.
Alternate Kiosk App
Follow these steps if you want to change the app that is associated with an existing Kiosk configuration:
1. Start by logging in with the credentials of the administrator.
2. Select Settings from the drop-down menu.
3. Navigate to Accounts.
4. Select the Family & other users page from the drop-down menu on the right.
5. In the "Configure a kiosk" section, select the Kiosk (active) setting from the list.
6. Select the application from the drop-down menu.
7. Navigate to the Change kiosk application.
8. Select the newly installed application by clicking on it.
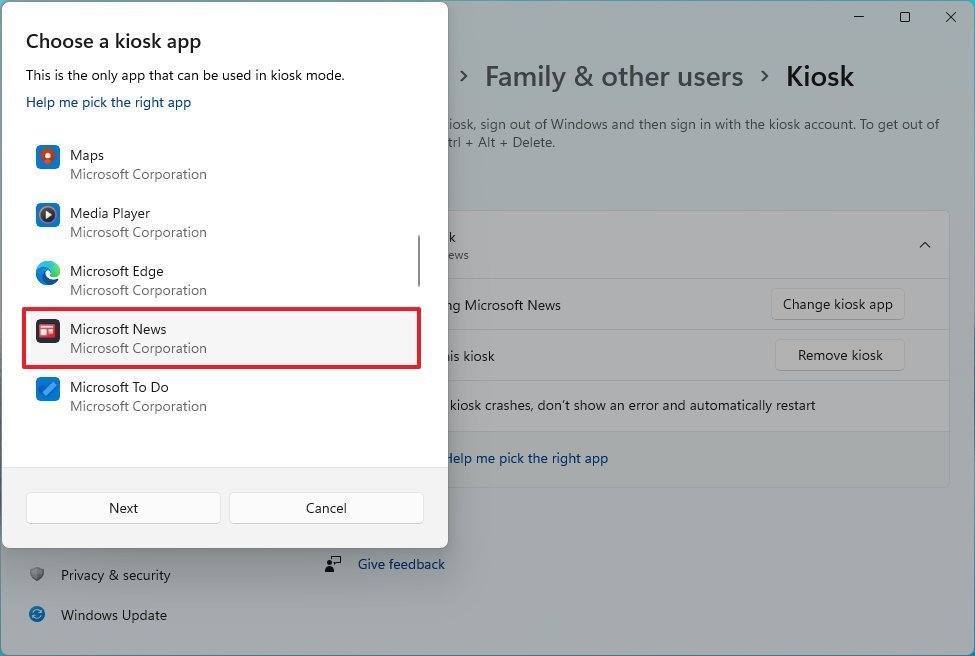
9. Select the Next option from the drop-down menu.
10. Click Cancel button will be displayed (if applicable).
The new app will automatically launch the next time you log into your Kiosk account after you've completed the steps outlined in this article.

