How To Record A Voice Memo Using The Voice Memos App
How to Record a Voice Memo Using the Voice Memos App
Making audio recordings using the iPhone The Voice Memos software is quite self-explanatory in its use. Find out how to use it to record voice on an iPhone in this tutorial.
1. To begin, open the Voice Memos application on your iPhone or other iOS device.
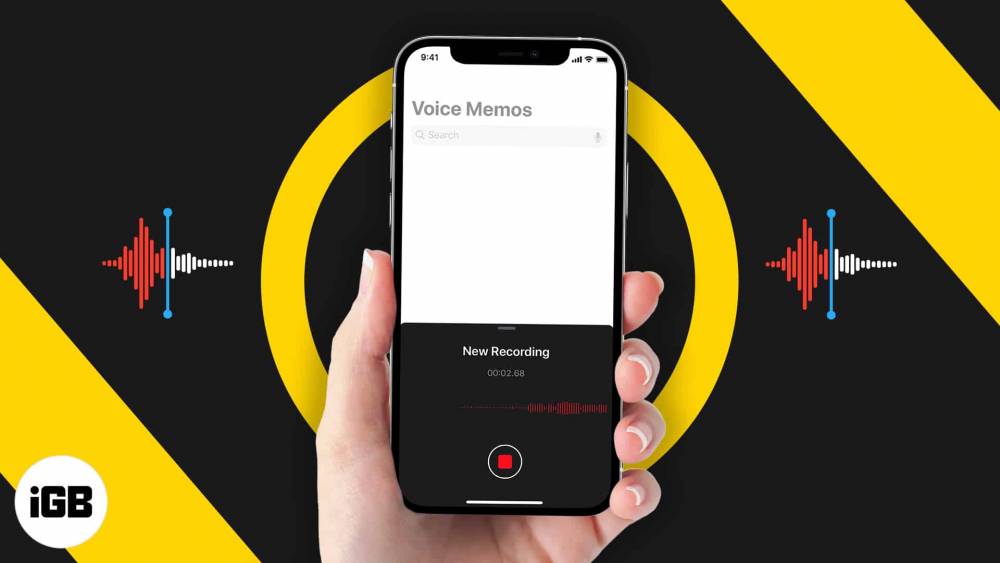
2. In order to start a new voice recording session, press the red record symbol at the bottom of the screen.
3. When you are recording, you can tap the small red horizontal line to show further settings. You can pause and resume the recording on the screen that opens, allowing you to keep many recordings within the same sound file.
4. Tap the red stop button on your recorder when you're ready to stop recording.
:max_bytes(150000):strip_icc():format(webp)/001-how-to-use-voice-memos-on-iphone-4799058-002ff850aa214b37a662ddf2ab736beb.jpg)
5. To begin recording, click New Recording at the top of the page and give the recording a name. The recording is saved under the name that you provide.
:max_bytes(150000):strip_icc():format(webp)/002-how-to-use-voice-memos-on-iphone-4799058-cc1d84608fb64beea373cd1ba60f8d06.jpg)
How to Trim a Voice Memo on iPhone
Apple's Voice Memos program only provides limited editing capabilities, according to the company. A voice recording can be terminated within the app, as described in this section.
1. From the Voice Memos launching screen, select the audio recording you wish to alter and press "Edit."
2. Squeeze the ellipsis as hard as you can.
3. From the Edit Recording menu, choose Edit Recording.
:max_bytes(150000):strip_icc():format(webp)/003-how-to-use-voice-memos-on-iphone-4799058-200272b1de1146bbbe3f9c63f4ae0753.jpg)
4. Select the crop symbol from the drop-down menu.
5. Use the yellow handles at the bottom of the screen to encircle the portion of the recording that you want to preserve and then press the Save button.
6. Press the Trim button to remove any piece of the recording that continues beyond the trim handle.
7. To make the changes permanent, click Save.
:max_bytes(150000):strip_icc():format(webp)/004-how-to-use-voice-memos-on-iphone-4799058-bacb6b6a6fd74754a5ead9928914171d.jpg)
8. To remove a section of audio from the timeline, click the crop icon, select a timeline segment, and touch Delete. Last but not least, press the Save button.
9. When you're through altering the audio file, click the Done button.

