How to Install CarPlay and Android Auto on Your Motorcycle

As motorcycle enthusiasts, we cherish the thrill of the ride, the freedom of the open road, and the exhilarating feeling of adventure. However, staying connected while riding is equally important in our digital age. Integrating CarPlay and Android Auto into your motorcycle can significantly enhance your riding experience, providing navigation, music, and communication at your fingertips. In this guide, we’ll explore how to install these systems on your motorcycle, focusing on products from Carpuride and highlighting important considerations along the way.
Why Integrate CarPlay and Android Auto?
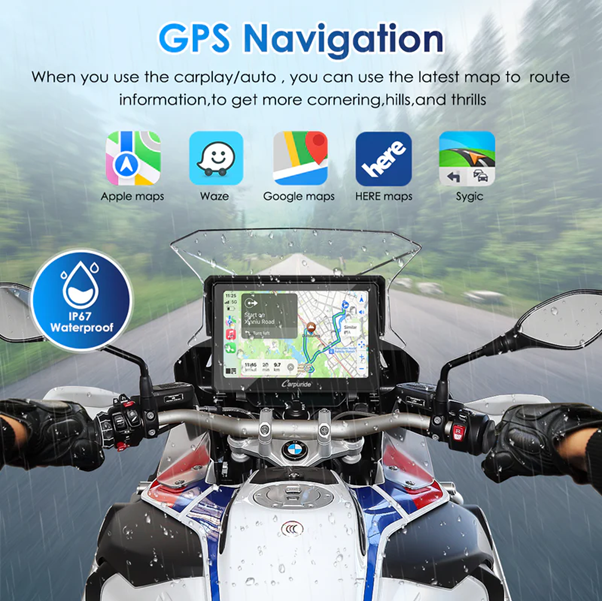
Before we dive into the installation process, let’s discuss why you might want to install CarPlay and Android Auto on your motorcycle. These systems allow you to seamlessly connect your smartphone to your bike, providing access to navigation apps, hands-free communication, and music streaming. With a quality motorcycle radio designed for these technologies, you can ensure a safe and enjoyable ride without missing important calls or directions.
What You’ll Need
To install CarPlay and Android Auto on your motorcycle, you will need a few key components:
- Compatible Motorcycle Radio: Look for a waterproof radio that supports both CarPlay and Android Auto. Brands like Carpuride offer high-quality options designed for motorcycles.
- Smartphone: Ensure your smartphone is compatible with either CarPlay or Android Auto.
- Mounting Kit: A mounting kit will help you securely attach the radio to your motorcycle.
- Wiring Harness: This will connect the radio to your motorcycle’s power and speakers.
- Tools: Basic tools such as screwdrivers, a wrench, and wire strippers.
Step-by-Step Installation Process
Now that you have all the necessary components, let’s break down the installation process into manageable steps.
Step 1: Prepare Your Motorcycle
Before you start, ensure your motorcycle is parked on a stable surface, and disconnect the battery to prevent any electrical issues. Remove any existing radio or audio system to make space for your new motorcycle radio.
Step 2: Install the Mounting Kit
Using the provided instructions, attach the mounting kit to your motorcycle. The location of the radio should be easily accessible while riding but should not obstruct your view or interfere with the operation of the motorcycle. Most riders choose to mount the radio near the handlebars for easy access.
Step 3: Connect the Wiring Harness
Next, connect the wiring harness from your motorcycle to the new radio. This usually involves connecting power, ground, and speaker wires. Ensure all connections are secure and use electrical tape for added protection against moisture and vibration.
Step 4: Install the Waterproof Radio
Carefully mount the waterproof radio onto the mounting kit. Ensure that it is secured and that the connections are properly aligned. Follow the manufacturer’s instructions for specific details related to your chosen radio model.
Step 5: Connect Your Smartphone
Once the radio is securely installed, connect your smartphone to the system. For CarPlay, you typically need to use a USB cable to connect your iPhone. For Android Auto, the connection may be wireless or via USB, depending on your motorcycle’s system capabilities. Follow the on-screen instructions to complete the pairing process.
Step 6: Test the System
Before taking your motorcycle for a ride, test the system to ensure everything is working correctly. Check the audio quality, navigation functions, and ensure that you can make hands-free calls. Adjust the settings as needed to tailor the system to your preferences.
Step 7: Final Touches
Once you’re satisfied that everything is working correctly, reattach any panels or coverings that you removed during the installation process. Finally, reconnect the motorcycle battery and secure any loose wires to prevent interference while riding.
Tips for a Successful Installation
- Consult the Manual: Always refer to the user manuals for both your motorcycle and the radio system. This will provide valuable information tailored to your specific models.
- Seek Professional Help: If you’re uncomfortable with the installation process, consider seeking assistance from a professional. Some motorcycle shops specialize in audio system installations and can ensure everything is set up correctly.
- Keep It Waterproof: Since motorcycles are exposed to the elements, investing in a high-quality waterproof radio is essential. This will protect your system from rain, dust, and debris, ensuring longevity and performance.
- Regular Maintenance: After installation, regularly check your connections and the functionality of the system. This will help you catch any issues early and keep your system running smoothly.
Enjoying Your New System
Once you have successfully installed CarPlay and Android Auto, you can enjoy a range of benefits while riding. From easy access to navigation apps like Google Maps to streaming your favorite playlists, these systems enhance every ride. With a compatible motorcycle android auto system, you can make hands-free calls, send texts, and receive notifications without taking your hands off the handlebars.
Moreover, these systems can significantly improve your overall riding experience. Imagine navigating through winding roads with real-time traffic updates or enjoying a long ride while listening to your favorite podcasts or music playlists.
Conclusion
Integrating CarPlay and Android Auto into your motorcycle is an excellent way to enhance your riding experience. With a quality motorcycle radio from Carpuride, you can stay connected, navigate seamlessly, and enjoy superior audio quality on your adventures. By following this step-by-step installation guide, you’ll be well on your way to transforming your motorcycle into a smart, connected machine.
So gear up, hit the road, and enjoy the freedom that comes with modern technology on your motorcycle! If you have any questions or need assistance, don’t hesitate to reach out to the Carpuride team for expert advice and support.
Related Courses and Certification
Also Online IT Certification Courses & Online Technical Certificate Programs

