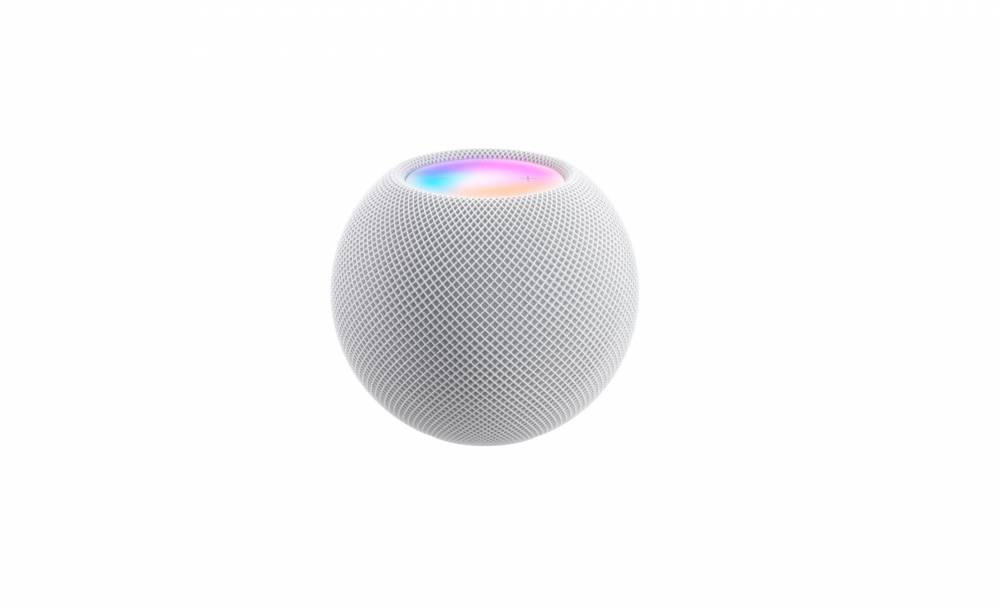
How To Restore HomePod Mini With Mac Or PC
How To Restore HomePod Mini with Mac or PC
Is your HomePod Mini not functioning properly? Whether your HomePod Mini is not responding at all or appears to be bricked, you can try restarting, resetting, or even restoring it to get it working again.
Unlike the standard HomePod, the HomePod Mini includes a USB-C charging cable, allowing you to connect it to a USB-C port on your computer. While your computer cannot be used to transfer content, it can be used to reset the software on your HomePod to factory defaults, which may be useful if you are unable to locate your device in the Home app or if it is acting strangely. Restoring the HomePod Mini should resolve almost all user-serviceable issues with HomePod, but it should be used as a last resort after rebooting the device, updating the HomePod software, resetting, and confirming network connectivity.
This section will demonstrate how to restore a HomePod Mini using a Windows PC or Mac.
How to Restore HomePod Mini from Mac or Windows
The steps are nearly identical on a Windows PC and a Mac, except that Windows users will use iTunes, while Mac users will simply need to open a Finder window. What you need to do is as follows:
1. Disconnect the HomePod Mini from the wall adapter and connect the USB-C cable to your PC or Mac via the USB-C port. Wait a few seconds before opening iTunes on a PC or a new Finder window on a Mac.
2. On the left pane, Mac users will see their connected HomePod Mini. Choose your device. Whether you're using iTunes or Finder, the following options will appear on your screen. To begin, simply click on "Restore HomePod."
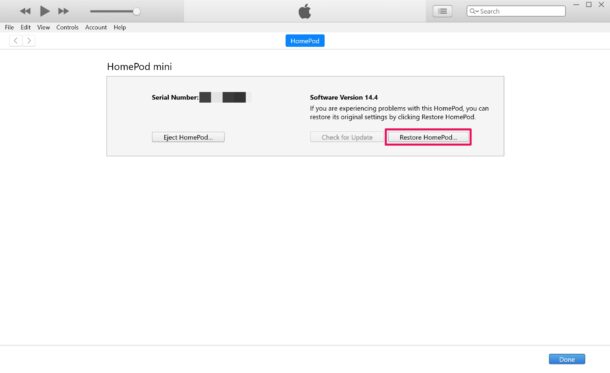
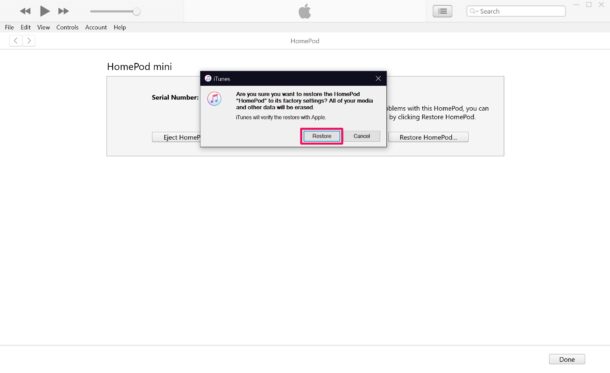
3. This will open a pop-up window requesting confirmation of your action. To proceed, click "Restore."
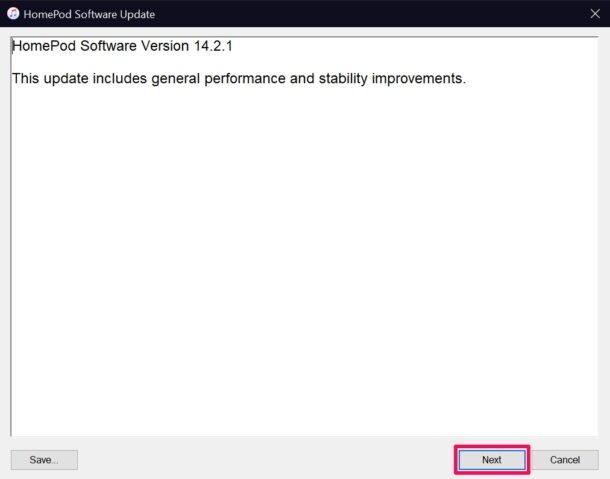
4. Now, iTunes/Finder will display the HomePod software version that will be installed during the restoration process. This is the firmware version that was included with your device when it was purchased. To proceed, click "Next."
5. Following that, you'll simply need to "Agree" to the terms.
6. Finder/iTunes will now begin downloading the software and, when finished, will restore your HomePod. This process may take several minutes, so click "Done" and wait patiently.
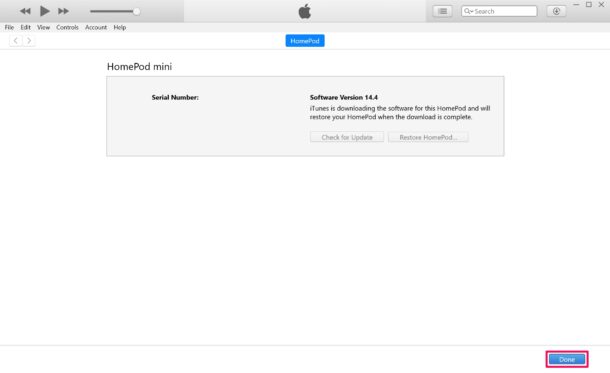
7. Once the restoration process is complete, your computer will display a pop-up notifying you of the same. Click "OK" to exit iTunes/Finder.
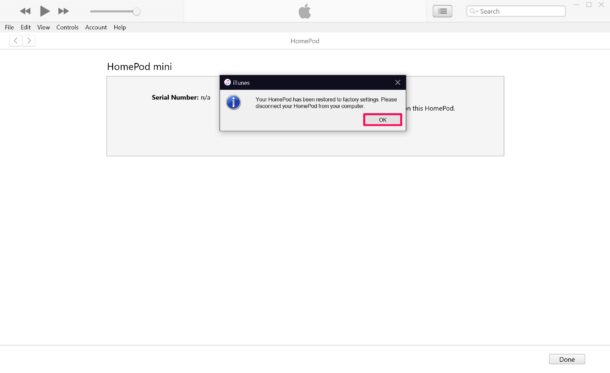
That is all. You can re-plug your HomePod Mini into the wall adapter after disconnecting it from the computer.
If your iPhone or iPad is nearby when your HomePod boots up, it will recognize it as a new device. You'll need to repeat the initial setup process.
We understand that not everyone owns a Mac or PC equipped with a built-in USB-C port, which is required to use this restore method. This is not to say that you are completely out of luck. What you can do is purchase a low-cost USB to USB-C dongle from Amazon and connects your HomePod Mini via that.
Using a computer to restore your HomePod Mini should be your last resort. Proceed only if you've already attempted to restart your HomePod/HomePod Mini via the Home app and to reset your unresponsive HomePod via the physical buttons. Of course, you can use this procedure if your HomePod Mini isn't responding to your gestures and you've exhausted all other options.
Image Source: OSXDaily
Courses and Certification
Basic Computer Skills Course and Certificate
Computer Engineering Course and Certificate
Computer Fundamentals Course and Certificate
iPad Basics Course and Certificate
Software Architecture Design Course and Certificate
Software Engineering Course and Certificate

