How To Upgrade The RAM (memory) On A Laptop
How to upgrade the RAM (memory) on a laptop
This article will show you how to upgrade the memory on your laptop.
1. Determine how much RAM is being used by your computer
On any computer, low memory is a common source of bottlenecks, resulting in not only sluggish performance but also issues with stability. For power users who multitask across several resource-intensive programs or who keep 30 or more browser tabs open at the same time, additional memory will almost certainly make your system run faster and more smoothly.
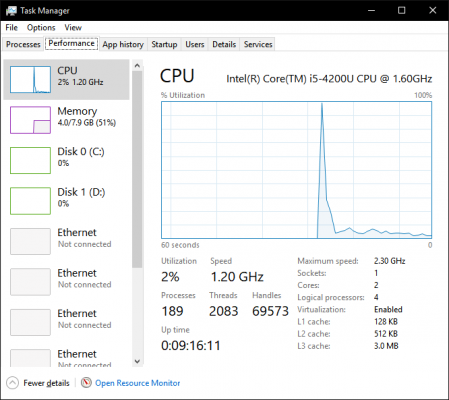
The amount of memory being used by your laptop can be seen in the Windows Task Manager. Simply right-click on the taskbar and select Task Manager from the context menu that appears after clicking. Then, on the performance tab of Task Manager, check to see how much memory is currently being used in relation to the total amount of memory available on the system. Also displayed is the number of physical memory slots that are currently in use, as well as the number of slots that are available for memory expansion.
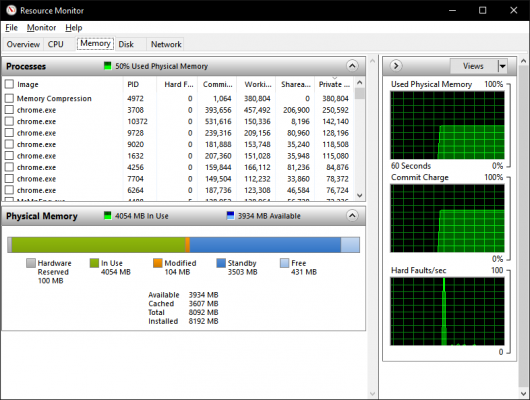
A more detailed view is available by selecting the "Open Resource Monitor" option at the bottom of the Task Manager window and then navigating to the Memory tab on the left-hand side of the window. Note that the screens will appear slightly different under Windows 7 than they do under Windows XP.
If you are close to or have exceeded the physical memory limit, you are aware that additional memory is required to complete the task.
2. Determine if you are eligible for an upgrade and proceed from there
Unfortunately, many laptops have sealed bottoms or memory that is soldered directly to the motherboard, both of which make it impossible to upgrade the RAM. (It's also possible that the system has a limit on the amount of RAM it will accept). The Memory Advisor tool from Crucial can help you determine whether or not your RAM is upgradeable. Following the entry of the brand and model of your laptop, you should see a screen displaying the maximum amount of memory and the number of slots available on your computer.
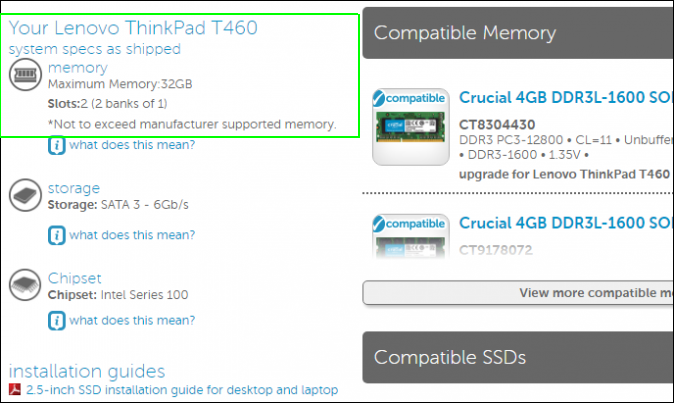
Crucial also lists memory modules for laptops, which can be found here. Other manufacturers, however, offer DIMMs that are comparable in performance. Remember to make a note of the speed and type of RAM that you require, which is typically one of the following: DDR2, DDR3, or DDR4 with a specific speed listed next to it; or (ex, "DDR3 PC3-12800").
3. Locate your memory banks by opening the panel on the side of the computer
Now that you have your additional memory, it's time to upgrade the memory on your laptop, which is a relatively simple process to complete. To begin, shut down your laptop and unplug its power adapter from the wall outlet.
After that, remove the panel on the bottom of your laptop that conceals the memory banks and place it somewhere safe. It may be necessary to completely unscrew the laptop's back in order to access the memory and other components depending on your system.)
4. Grounding yourself will help you avoid electrostatic discharge
However, before touching any component of your computer, make contact with any metal surface that is present within it (e.g., the back of the hard drive or a metal connector for another component). Performing this procedure will rid your body of any potentially hazardous static electricity.
5. Delete memory if it is necessary
If all of your memory slots are already full, you'll need to remove and replace the DIMMs that are currently installed. To remove the memory module, pry the clips that hold it in place apart with your fingers. The memory module should be positioned so that it faces upward.
Next, lift the memory module out by its edges, being careful not to come into contact with the gold connectors at the bottom.
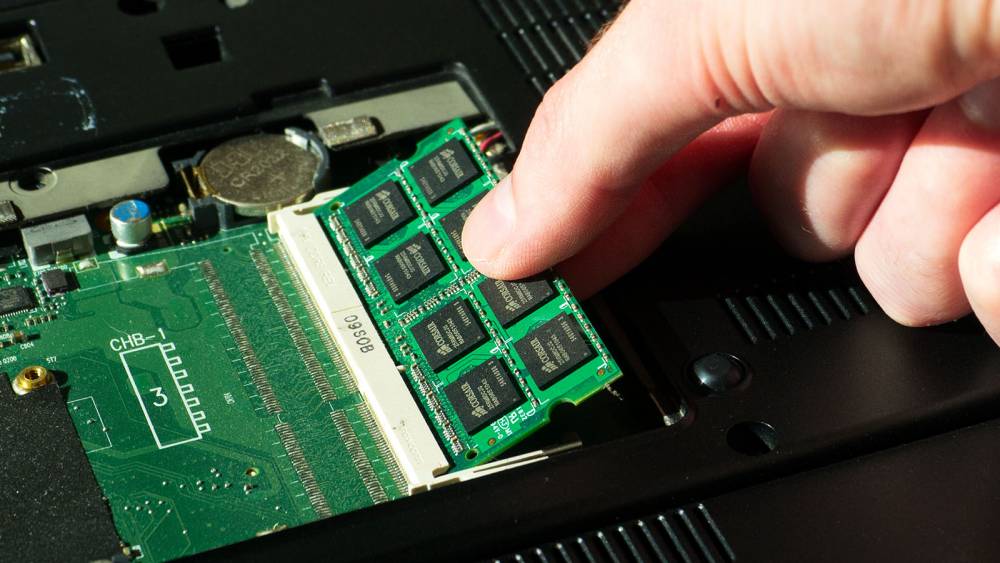
6. Installing a brand-new memory module
After that, insert the new modules into the open slots at a 45-degree angle, with the gold edges facing down. Repeat the process with the remaining modules. Put equal amounts of pressure on the tops of each of the modules with your fingers to secure them in their final positions. As soon as you hear a click and feel a DIMM snap into place, gently push the module back until it is flat and level, with the clips holding it in place.
That is all there is to it! Restart your laptop and check the System Information or Task Manager windows to see if the new memory has been added. If it hasn't, repeat the process. Take advantage of the increased memory capacity.

