How to Indent Paragraphs in Google Docs
How to Indent Paragraphs in Google Docs
The ruler, which is only accessible through the full web version of Google Docs, is required in order to properly indent paragraphs in Google Docs. The ruler is not present in the mobile applications, which is a shame.
A ruler is not available in the Google Docs mobile applications for whatever reason. Additionally, you are unable to create indents in Google Docs using formatting styles because of the limitations of the platform. You must therefore use the full web version and enable the ruler in order to indent your text properly.
In order to begin, select the paragraphs to which you want to apply the indent (or press Ctrl+A to select the entire document) and then click OK.

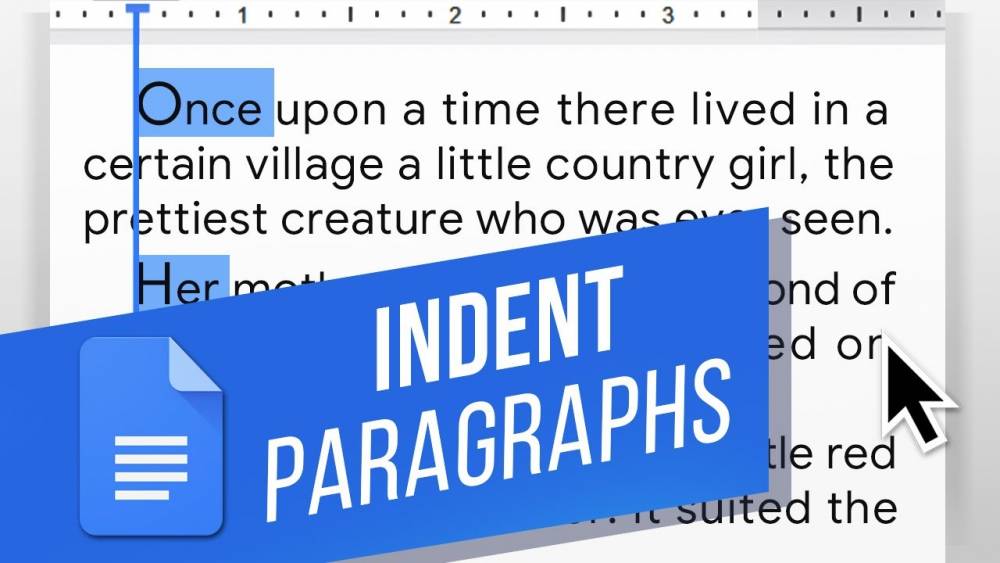
After that, look at the ruler at the top of your document (if you don't see it, go to View > Show Ruler to bring it up). There are two stacked light blue markers on the left side of the ruler: a horizontal bar at the top and a downward-facing triangle at the bottom. These are both light blue markers.
The First Line Indent is indicated by the horizontal bar at the beginning of the first line. It's used to specify the indentation of the first line in any selected paragraphs by specifying the first line indentation. The Left Indent is indicated by the triangle. It is used to control the indentation of the paragraphs that have been selected.
However, this can be changed. By default, both markers are set to the right edge of the left margin of the page (so that your text begins at the right edge of the margin), but this can be changed.

Let's start with the most fundamental type of indent, which is the first line indent. Using your mouse, drag the First Line Indent marker to the right after you've selected one or more sentences. It's a small element that requires precise clicking, so you may need to use the zoom feature on your browser if necessary.
As you move the marker to the right, a vertical line appears to assist you in aligning your indent, and a black box appears at the top of the screen to indicate the number of inches indented. When you're finished, simply release the marker, and the new indentation will be reflected in your paragraphs.

Left Indent is a marker that you can use if you want to indent all the lines of any selected paragraphs from the left margin. Select your paragraphs and drag the Left Indent marker to the right after they have been selected. This time, the lines of the paragraphs have all been shifted to the right. You should use this type of indent if you plan to include images or side headings in your document.

A hanging indent (also known as a negative indent) is created by combining the two indentation markers, which means that the first line of a paragraph is not indented, but all subsequent lines are. This is a common style of writing. In bibliographies, works cited lists, and bibliographies, these terms are frequently used.
The procedure for this one is two-steps long. To begin, drag the Left Indent marker to the right to specify the level of indent that you wish to have.

Additionally, the "Increase Indent" and "Decrease Indent" buttons have been added to the toolbar in Google Docs. However, if your browser window isn't fully visible at the time, you may need to click the three-dot button to reveal any hidden buttons. Following is a list of the indentation buttons to use:

Using the buttons on the keyboard, select whether you want to move the entire left indent (every line of selected paragraphs) to the right or left by a half-inch with each press. Although it is a convenient way to control the indent of an entire paragraph, the buttons do not provide the same level of flexibility as the ruler markers.

