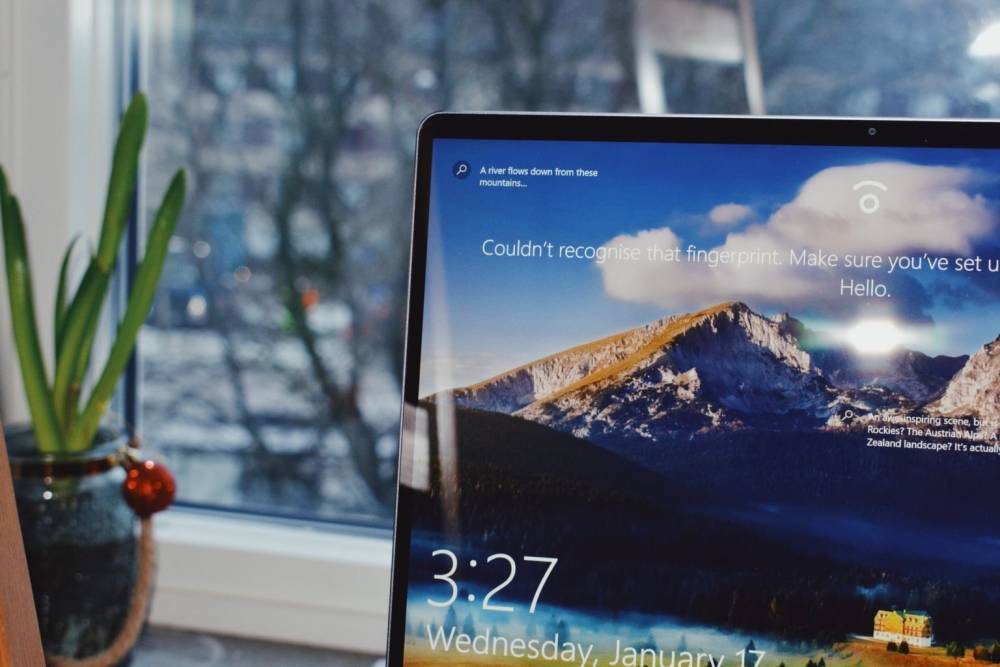
How To Remove Windows 10 Built-in Ads
How to Remove Windows 10's Built-in Ads
While all editions of Windows 10 include advertisements, the good news is that the majority of them can be permanently disabled. Thus, here's how to remove ads from the Start Menu, Lock Screen, File Explorer, and Notification Prompts in Windows 10. Additionally, we'll demonstrate how to disable the Windows Ad ID for increased privacy and disable all distracting 'Live Tiles' on the Start Menu.
Remove Ads from the Start Menu of Windows 10
1. To remove advertisements from the Start Menu, navigate to Windows 10's 'Settings' menu by clicking the lever icon in the Start Menu.
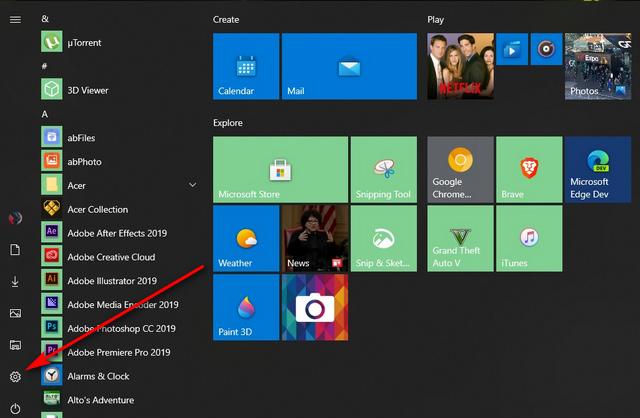
2. Then, select 'Personalization'.
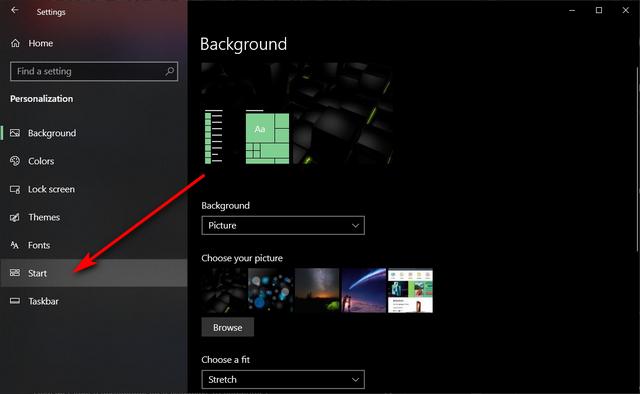
3. Now, select 'Start' to personalize the Start Menu.
4. Finally, uncheck the box labeled "Show suggestions in Start on a sporadic basis."
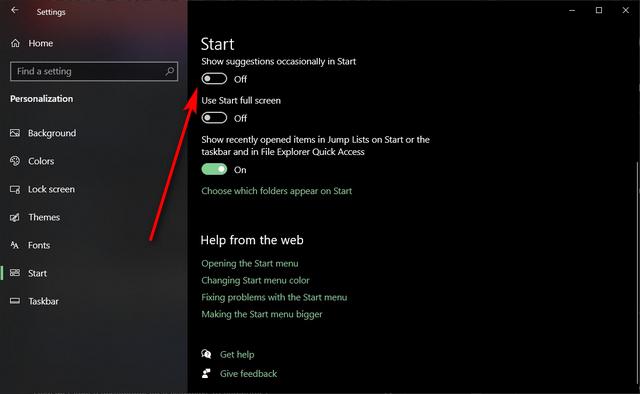
That is all. You've now completely removed all advertisements from the Start Menu.
Remove Ads from the Lock Screen of Windows 10
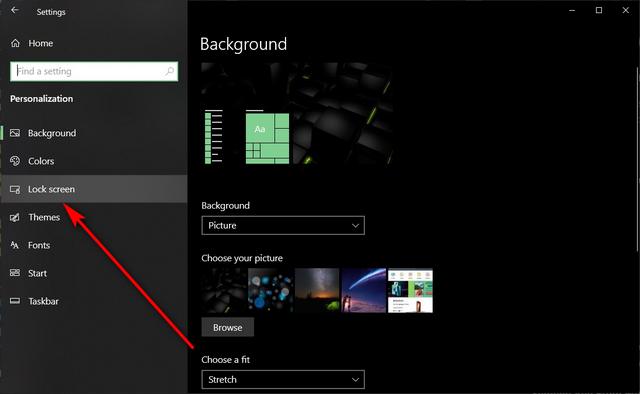
1. To disable lock screen advertisements, navigate to Settings > Personalization as described previously. Then select 'Lock Screen'.
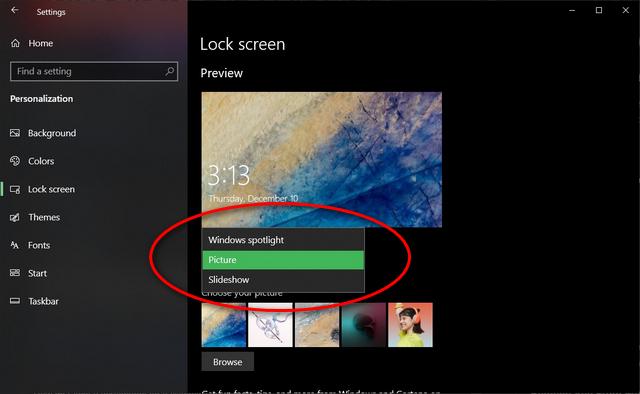
2. Now, instead of Windows Spotlight, change the background to 'Picture' or 'Slideshow' from the drop-down menu.
3. Additionally, you should disable the "Get fun facts, tips, and more from Windows and Cortana on your lock screen" option for added security.
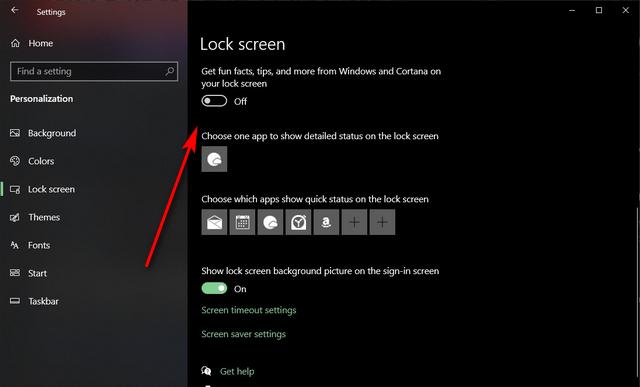
Your Windows 10 lock screen is now completely free of advertisements and intrusive 'tips' and 'fun facts'.
Remove Ads from Windows 10 File Explorer
Microsoft introduced ads in File Explorer with the Creators Update in 2017, but later removed them due to widespread user backlash. However, because the option is still enabled by default, it makes sense to disable it in case the company changes its mind.
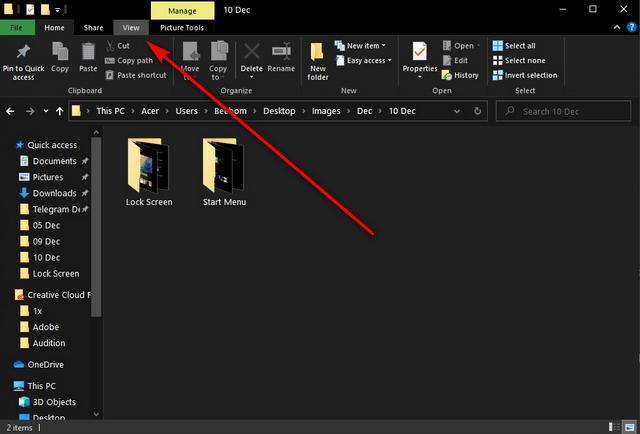
1. To remove banner ads from the Windows 10 File Explorer, click on the 'View' tab as shown below.
2. Now, on the top-right, click on 'Options' and select "Change folder and search options."
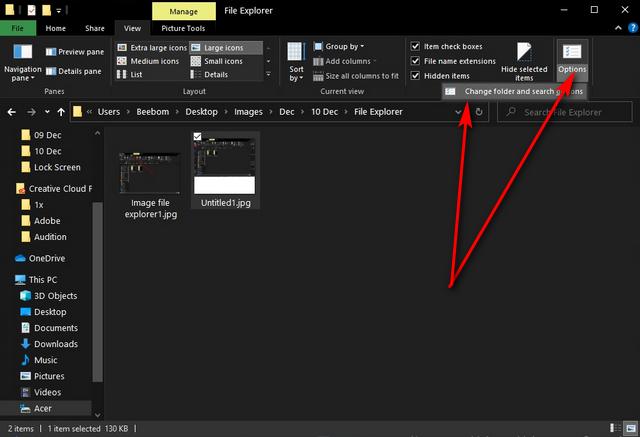
3. At the top of the popup window (see below), click on the 'View' tab.

4. Scroll down to the bottom and uncheck "Show sync provider notifications." Finally, click on 'Apply' or 'OK' to save your changes.

You have now permanently removed advertisements from the Windows 10 File Explorer.
Remove Windows 10 Notification Ads
1. To disable notification advertisements (Microsoft refers to them as 'suggestions,' navigate to Settings as described previously. Now, select 'System'.
2. Next, on the left pane, click 'Notifications and Actions.'
3. On the subsequent screen, deselect the option "Show me the Windows welcome experience...".
Note: On some versions of Windows 10, this option is presented as a toggle; in that case, you must set the toggle to 'Off'. The remainder of the procedure will be identical.
4. For an even cleaner Windows experience, uncheck "Get tips, tricks, and suggestions..." and toggle off "Get notifications from apps and other senders."
Turn Off Advertising ID in Windows 10 for Better Privacy
1. Windows 10 sends a unique advertising ID to app developers and advertisers for each user, but this is a privacy concern and should be disabled permanently. Navigate to Settings > Privacy to accomplish this.
2. Select 'General' and disable all toggles as shown in the screenshot below to improve your privacy.
Courses and Certification
Windows Server 12 Course and Certificate
Windows OS Course and Certificate
Basic Computer Skills Course and Certificate
Basics of Computer Science Course and Certificate
Computer Engineering Course and Certificate
Computer Fundamentals Course and Certificate

